There are alot of tutorials on YouTube and that's where I first went to learn how to make them. Everyone I watched was about the same, until the end part where you have to smoosch (is that a word?) it together and glue it. That was the hard part and after many tries, I figured there MUST be an easier way!
And I did come up with an easier and simpler way to make them. I was pretty proud of myself.........
patted myself on the shoulder and thought I was a real wizard!
Alas!............ my balloon has been popped. Just the other day, I was on YouTube browsing, and saw a rosette tutorial. I thought I'd watch it just for fun, so I could watch the person struggle with the final gluing steps and get a good giggle! But low and behold........... SHE was using MY secret! One catch though.. she had posted her video about a year ago. Phooey... I guess I'm not the only smart one out there. Someone else had thought this up too
Well, here goes anyway. There are alot of photos so be patient!
 |
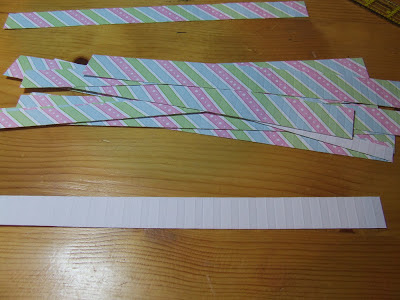
| I use a 12x12 sheet of paper. Light or medium weight is good. It can be one sided or two sided. Heavy cardstock works but sometimes is harder to do the folds. |
 |
| First, I score the paper every 1/2 inch. NOTE, if you just want to do one rosette, use a 1" x 12" strip instead of a whole sheet. |
 |
| Then turn paper over and score in between the half inch scores, so the final paper is scored every 1/4". It seems to fold easier if you do it this way instead of scoring every 1/4" on one side. |
A note here, if you just want to make one rosette, you only need one strip of paper. To start, I would suggest a 1" strip, and score it every 1/4" per my above instructions. This is great if you want to use up your scraps!
 |
| As you fold, I like to be sure the folds are crisp and flat, so every few folds, I kind of push down on the entire little accordian. |
 |
| When all done, really press it all together and try to do it so the folds are all pretty even. As you go, you may have to tweak some of the folds to keep them even! |
 |
| Here's the finished strip. You can now lay it down and let it unfold. It won't pop out very far if you've made the folds nice and crisp. |
 |
| Now cut off one of the ends. It doesn't matter which one. |
 |
| See? like this....... |
 |
| Try to cut it off right at the fold (not like me.. I kind of messed this one up!) I trimmed off that little bit left to the right of the fold. |
 |
| See here where I joined it? You can't even tell where I joined it and that's the way you want it. |
 |
| Here's your joined strip - forms a circle. |
 |
| You've got to SMOOSCH it down! Kind of press everything down on the inside of the circle. It will then lay flat, like the below photo. |
 |
| You need to scrunch it up so the center hole is really small. |
This was VERY frustrating to me! The gals on the YouTube videos didn't seem to have too much trouble, but I'm sure it took lots of practice before they got it right.
Now for my secret (well, I thought it was mine!). Oh... and you can let the rosette pop up while you do this! Once you do this, you are good to go for all of the rest of your rosettes, forever and ever.
I had to play around with different lid sizes for the different sized strips that I cut. I now cut my strips to match the lid size. I looked around the house forever to find the size lid (above) from my teapot, to fit my 1-1/4 or 1-1/2" rosettes!
I find that a prescription bottle lid works great for a 3/4" strip. A vitamin bottle lid works good for the 1" strip, but I found that it's a little small for the 1" strip, so I cut my 1" strips at 7/8" rather than 1 inch. It's just a matter of trial and error.
THAT'S MY GREAT SECRET (I thought it was mine... oh well) and it works so wonderfully that I just couldn't stop making rosettes!
 |
| Then place the glued circle onto the rosette and hold for about 5 seconds, while pressing down quite firmly. |
 |
| You can easily remove the rosette from the lid using your tweezers. |
 |
| And there you have it! Your rosette is solid and glued like a rock and won't come undone! |
I've cut two different size circles, glue them together, glitter the edge and then use it instead of a button. Works great. I've also found a YouTube video for making your own buttons! Search for recycled buttons. I'm going to try making some of those!
You can ink the edges of your strip before or after the rosette is done. I like inking it afterwards, and I can also ink some of the folds.
 |
| Add some glitter to your edges if you want to. I love the look! |
HOPE YOU ENJOY THIS and have fun making your paper rosettes! Let me know if you have any questions.


.JPG)


Great tutorial!
ReplyDeleteI've made a few and the scoring was so tedious! But the final product is so cute.
The scoring isn't so bad if you do a whole or half sheet of paper! Kind of relaxing to me while I'm watching TV!
DeleteThis is a great step by step tutorial.
ReplyDeleteDid you know that you can fold whole the 12x12 sheet before cutting the strips? It's much more efficient and easier for my gals who have tendinitis/arthritis.
Fold, flatten, slice into strips and refold.
Have a great day!
That's a good idea Lalia! Normally, I probably wouldn't do a whole sheet of paper and make that many of the same rosettes... but I was making some for a festival we had in our town so I made whole sheets of paper at a time! This would have cut some time off.
DeleteThanks for reading my blog!
What a great idea, Marilyn on placing the accordian folded smooshed (I use that word, too!!) in a round lid! Now I need to start working on saving various sized lids so I can have them accesible! I've just placed Beacon's 3-n-1 Glue (kinda like hot glue texture without the heat!) and placed it on a dot, then laying something with weight on top of the folded part to get it to set. Your way seems SO logical! Thanks for sharing!
ReplyDeleteThank you for the comment Jann! Using the lids is SO EASY! I love it. You can also use Liquid Glass on your little circle that you put on the backside... just takes longer to dry but once dry, holds as good as the hot glue. If I use the Liquid Glass, I put something on top to hold it down, or I hold it and count about 40 seconds. I like the hot/cold glue as dries in about 5 seconds! Have fun with these!
DeleteIm trying to make a "double" rosette (one on top of the other) with the top one being just a bit smaller than the bottom. Can I just run my middle "circles" (I'm going to do a top and bottom circle for more stability) through the xyron & it hold both of them instead of the hot glue?
ReplyDeleteHi Kelleygirl... I'm SO SORRY I didn't respond to your comment! I never get notified of comments or any that are "awaiting moderation". I just saw this one and I've been moving so haven't been real active on my blog for awhile. For your question, you could try using xyron on your little circles.... you probably already have! I don't know if they will hold it well enough but try it. I find that the hot glue is such a good strong hold and that the rosettes never come apart. I've tried using other glues and sticky tape but it just doesn't hold very well. let me know if the xyron works. Marilyn
Delete.....and this is why I love the internet!!! Thank you for posting your brilliant idea!
ReplyDelete