Showing posts with label videos. Show all posts

Sunday, February 14, 2021

Friendship and love...

HAPPY VALENTINE'S DAY TO EVERYONE!

I'm so sorry I haven't posted for awhile. I hope to get my blogging mojo back soon! I'm posting this wonderful, beautiful music video for your enjoyment.... Inka Gold..... their guitar and flute music is just so soul soothing, which we all need right now. This is a special concert they did today from their home in New Mexico, for "friendship and love". 


Put  your earphones on..... relax... listen.... enjoy......send your love out to everyone you can think of!

Hugs to all!

~Marilyn~


ALL CONTENT © PINK PAPER COTTAGE.
PLEASE DO NOT COPY MY PHOTOS AND IMAGES INTO YOUR OWN POSTS WITHOUT FIRST LINKING TO THIS BLOG AND MY NAME.

Sunday, May 31, 2020

Nothing big but lots of fun!

Hi friends.........
I  thought I'd take a few minutes to share with you some of the fun crafty things I've made in the last couple of months. Seems like I've been glued to my TV watching YouTube videos (on mostly paper crafting of course!) way more than normal!

I'm really into buying digital printables from Etsy right now - words and phrases, journaling tags, vintage images, etc.

I don't know why this Shelter in Place has caused me to do that (be a couch potato). I think at first it was just an excuse to sit more and stay inand watch more YouTube! And the weather wasn't that great  in March and April, so lots of rainy days gave me even more excuses to just sit and make "stuff". 

Altered paper clips with "dangleys"
Most things I've made were "just for the fun of it".. with no particular person or reason in mind. I just made something because I saw a project I liked and wanted to try my hand at. I should have kept a list, because now, when I look around my craft room, I don't see that many new creations.. I have given some away "just because", made a few gifts that have already been sent on their way, and tuckedhidden away other goodies I made here and there. 


I made some Tiny Little Books. My Porch Prints on Etsy sells the digital downloads that you then cut out and assemble the covers and little pages inside. These were a birthday gift for my son's fiance. She absolutely LOVED them!


I will be getting some more of these printables as she has several others that I didn't purchase. She even sells a digital printable for a tiny bookshelf to hold them all!
Some of my favorite YouTube channels have been posting tutorials more than normal... some everyday! I love that! And some are having giveaways and challenges, which I usually don't take part in, but I decided I would do a few because I had the time. That was BEFORE all the yard work started!


Gift bag I made from Posh Paper Lady's tutorial - using plain old copy paper! Amazing huh? I printed out the image from one I found on the internet (free).. and then put together her gift bag. She did a series of tutorials on making things with plain white copy paper.... gift sacks, notebooks, tiny boxes, tiny gift bags, etc. I willhope to  make them all!
Here is the link to Posh Paper Lady's channel: Posh Paper Lady. If you want to just play and craft with paper, go give her channel a look. I love her! I love what she makes.  Here is an envelope card I made following one of her tutorials, and it's part of a giveaway she's holding that ends on June 6th. I earn extra chances to win by posting my project on my blog, so here it is!


Front of envelope "card" (which is made using two envelopes of any size).... I used some digital paper that a friend of mine gave me to cover the envelopes.
I'm linking  HERE ON YOU TUBE  to Posh Paper Lady's specific tutorial for making this card if you are interested. It was fun and fairly quick, and came out so darling.

Inside of card. On the right is the 2nd envelope. The flap opens up to hold some money or a gift card or a special note. The "burlap" is really just some digital papers I downloaded from a purchase I made on Etsy. It looks so real!


Back of card. Such pretty digital papers.

Front of card, using a digital printable tag from Gi Kerr's Etsy shop, Happiness in Crafting.
I love the YouTube channels Posh Paper Lady, Scrapbooking with ME, Septeria18, Rejoice and Create, and Lyriclover Crafts (among many others). Gi Kerr (Happiness in Crafting), Shabbydabbydoodah, and My Porch Prints are three of my favorite digital printable shops on Etsy. Their papers and ephemera are so SHABBY and lots of pink!

I made this little folder/folio using a digital download freebie from the Happiness in Crafting Facebook group (Gi Kerr). She has started a Friday Freebie every week on her FB group and then she does a tutorial on something you can make with it. This little folio is so sweet - I love her shabby designs and papers.


Here are a few other things I've made. Gee can you tell I love pink???


Some small envelopes (tutorial by Scrapbooking with ME) for an album or journal, using old book pages.  I sent Edith at Scrapbooking with ME some of my old book pages that I had. She sent out a request on one of her videos and I guess she got all sorts of old books and old sheet music and book pages. 

A flip open tag or photo holder - tutorial by Scrapbooking with ME for her #maychallenge. I'm taking part in her challenge and trying to make several of her items and posting pictures on her Facebook group and Instagram. She's having a giveaway at the end of the month! 


Inside - has pockets for tags and goodies.
Before this post gets too long, I want to mention and THANK my blog friend, Marilyn at  Mountain Top Spice for this darling Scripture Journal that she made and sent to me recently. I absolutely love it! She lives in Northern Idaho in the most picturesque and beautiful area around the Pacific Northwest! 


She used tea dyed papers inside with torn edges, and added some of her favorite scriptures.  I also spent some time going through one of my Mornings with Jesus magazines and added my own loved scriptures. I also added some doodling here and there.


Marilyn has also written and added her own (stunning) photography to a book entitled Through Love's Eyes. It can be purchased through Westbow Press, and I think it is also on Amazon.  The front cover is a photo she took of her own property, and that is her barn! Her photography is incredible, and many of her photos can be viewed on her blog. Her recent blog post of a couple of days ago, has a short video of Marilyn introducing her book and showing some of her pages inside. Her poems and writings inside accompany each picture, and she does have an wonderful way with words. It would be a book worth having, or to give as a gift. 


I want to say that I haven't ONLY been sitting and watching TV and videos! Much more is going on behind the scenes here now that Spring is finally here... much yardwork, cleaning, organizing, trying to do a few "good deeds" and sending happy mail out now and then.  I'm also working on crocheting two baby blankets for twin great nephews who are due on June 4th! I have one done and the second is about 2/3 done.... I need to hurry up and finish that one! So much to do.... so little time..........

My crafting "roll" kind of ended around May 8th, when we got the 12 yards of gravel delivered and we started working on our back  yard gravel and dirt area. We have worked ourselves silly, and are still not done, but making some good progress! (but I have still managed to squeeze in some paper crafting...........) 

More to come on our yard progress.... on the next post!

Have a good weekend everyone!


Thursday, March 29, 2018

I'm on a roll...........(jelly roll that is)........

I don't know when this happened, but for the last few weeks, at least, I've been on a REAL roll with my crafting and sewing (mostly sewing)! My mojo has returned full force, even while I was sick with the diverticlitis (well.. I had to take a few days off!).

What is this you say?
I'm in the MAKING MOOD. I know some of you get like that, as I've read your posts where you make things over and over and over again because you are addicted to it! That's me lately. I haven't sewn that much in years.. but lately... I just WANT....TO....SEW!


I mean... I've made a few cards (will show those later), and in my mind I want to make some more sweet and unusual mini albums, but the sewing machine has taken first place for now........

First up...........placemats. Why? I don't know. (Well I think I may know..... I watched so much YouTube while I was sick, that I saved TONS of things I want to make and watching it reminded me of things I've made in the past - that I want to make again!).

I think I happened upon some "easy placemats" on YouTube, and they were using some jelly roll strips, so I just had to try them. I have had an old jelly roll (42 strips of coordinating fabric, cut 2-1/2" wide) laying around for years.... have been hoarding it as so so pretty.... but decided.. why not? Use it up and enjoy it!

Here's what a jelly roll looks like (not mine... as mine is totally desecrated now!).....


To make the placemats, cut a backing fabric (from my stash)...  cut the batting...... sew the strips on, through the batting and backing fabric, and  you've already quilted your placemat! So fun! I used two large pieces of fabric from my stash for the backings.... 4 yellows with roses, and 2 yellow with tiny tiny roses on it. The strips are all uneven and stick out over the edge...........

 So once done sewing them on.. you "square up" the mat and trim off all the strips and then make the mat the size you want. Mine are 13" x 19".
Pretty already, right? Just love the pinks, lavenders, yellows and touches of green.
Next...... cut some for 2" strips (I used mostly strips from the jelly roll) and sew them on for the binding. I didn't take any pictures of sewing on the binding but it was fairly easy. I followed a YouTube video of a different way to sew it on, using the machine rather than finishing it by hand. Here's a link to the video: Easy and Fast Quilt Binding.

For me to make SIX placemats and actually finish them... a true miracle! Here's the finished product and I'm very ecstaticly pleased.... and I'm going to KEEP something I made for a change! (NOTE: these were not hard to make, but they were quite time consumming).


See the center mat? It is turned over to the pretty yellow cottage rose side.


The binding on this one matches the backs of two of the mats.


I'm SWOONING over that fabric 2nd from the left, that is white with the soft pink roses on it... wish I had yards and yards of it.

Here's the pretty backing on 4 of the mats. They are all reversible so I can use either side. I have hoarded this fabric for years!

Isn't it funny how when we finish something, and love it.. that we take WAY TOO MANY photos of it? I'm guilty of that..........

These are the two mats with a different backing. I really like it too and it matches pretty well. On these two, I used different colors for the binding.

Ta da! All six FINISHED placemats!
Now that's just a start. Should I show you more now or wait for another post????????????????

Think I'll wait......


Hugs to you.. 
~Marilyn~


Saturday, February 3, 2018

Tea and bananas......

What have I been up to lately? I'm kind of scattered it seems... can't settle down and stick to making one thing! So I've been cooking and crafting, a little bit of this, a little bit of that.

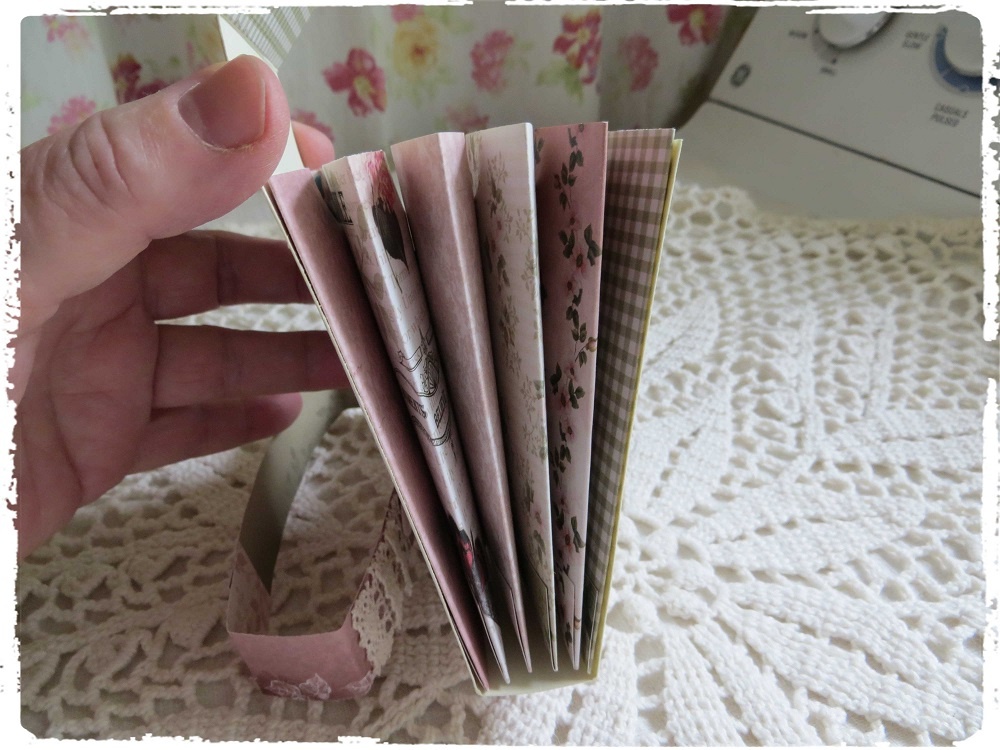
I watch a lot of You Tube... the other night I saw the cutest little tea bag holder. I'm always searching for new ways to gift tea to friends. This one was different and so cute!  Here's a tiny peek!

Do you want to see more? Here is my finished "prototype". I would do a few things differently. The gal whose video I watched made it taller, so it would hold a small candy bar. But I found that it was too thick and wouldn't close. So I made mine not as tall, but now it's still too tall for the tea bags, as they slip down to the bottom of each pocket! I'll fix that next time.


I used some pretty pink vintage papers from Couture Creations - Vintage Rose Garden. Love those papers, but you can't see them very much in this little folder. I'd better make a gift bag to match, right? And this being a prototype, each little pocket I made was not exactly the same size as the other, so the bottoms don't line up too well. How that happens, I don't know.... when I cut the paper exactly the same size for each, and fold on the exact same score lines! A mystery to me......

I made a "belly band" to hold it closed. That top flap pops up if you don't put the belly band on it (or you can use a magnet but I couldn't find mine). Decorated it with lace and sweet little hearts, a wooden spiral "button" and a tea tag I made. I typed out the saying on some nice cream cardstock and then used my Sizzix to cut the little framelet...... inked the edges with light brown ink.

It stands up on end, all by itself. I like that... for storage reasons.

The inside pockets are where all the pretty paper is!


This will make darling gifts and I can use up some of my paper scraps and 6x6 paper pads. Here is the video link to the gal who made this: Positively Papercraft.  This is what her little folder looked like:


Now I'm sure you're asking what bananas have to do with tea??????? {smiles}

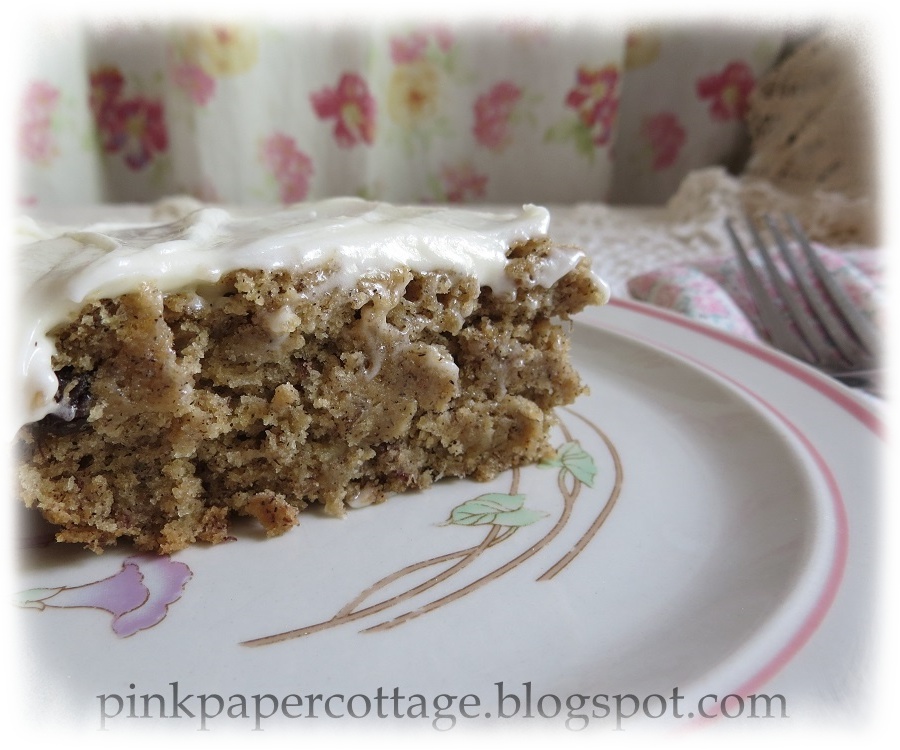
Well..... yesterday, I needed something sweet. Hubby and I are trying  failing to cut out alot of sweets and bread in our diets... due to the holiday weight gain (why does that have to happen every year?) But I can't seem to go a day without something sweet!  Does that happen to you? I"m so hooked on sweets, so I tried to make a "healthy" dessert. I found a gluten free banana bar recipe I had saved, which would have been fine if I hadn't added the cream cheese frosting............ 

It did turn out DELICIOUS! It's healthy in the fact that it has some buckwheat flour added, and applesauce, bananas (fruit right?), raisins and almonds. So healthy right???? Please say I'm right!


I only added 3/4 cup of brown sugar rather than the 1-1/2 cups called for in the recipe. Does that count as "healthy"? Yes I know... I could have added honey or stevia instead, but the consistency isn't the same with honey, and the stevia makes it taste a little bit bitter to me.


Here's my version of a recipe that was not gluten free...... I had to adjust it. I don't know where I got the recipe. The maker is a Susan Stuff from Mercersburg, PA. I think it was in a cookbook my husband got at a thrift store so I tore it out to use!


Gluten Free Frosted Banana Bars

Heat oven to 350°. Bake for 20-25 minutes.

3 tbs. soft butter
3/4 cup brown sugar
2 eggs
1-1/2 cup ripe mashed bananas
1/2 cup unsweet applesauce
2 tsp. vanilla extract
1-3/4 cup gluten free flour mix
1/4 cup buckwheat flour (or any other kind of GF flour)
OR
Use 2 cups of a GF flour baking mix, I like Bisquick
   or King Arthur, or Krustez
1 tsp. baking soda and a dash of salt
Optional:
1 cup raisins
3/4 cup sliced almonds
I added both... add anything extra you want, like dried cranberries, or walnuts or pecans, or dried apricots, etc.

Beat butter and sugar until crumbly, about 1 minute. Add eggs 1 at a time and beat after each addition. Beat in the bananas, applesauce and vanilla. Now add the flour on top with the salt and baking soda and mix those together a little bit on top of the egg mix... then stir it all together until well blended. This calls for using just one bowl, rather than two! I like one bowl desserts! Don't overmix.

Add mix to a well greased (I use butter or coconut oil) 9x13 baking dish, The batter will be stiff but not like cookie dough.. should be like a cake mix but a little stiffer. Spread it to about 1" thickness or a little more. 

Bake 20-25 minutes. Mine was done in 20 minutes but I live at a higher elevation. Check with toothpick to see when it's done. I'd rather undercook it a little bit so that it will remain moist and heavy, like carrot cake. If you overcook it, then it's more like a cake and a little dry.  Let cool for about 1/2 hour and then frost.

FROSTING:

Blend 1 8 oz. block of cream cheese, 1/4 cup soft butter and about 2-1/2 to 3 cups of powdered sugar and 1 tsp. vanilla in a bowl. I added a little bit of milk as it was too stiff, but just 1 tbs. to start with, and then maybe a little more.

MORE COOKING.............

Oh!  And I also made some freezer applesauce from a big box of Pink Lady apples I got from my sister. A big truck had rolled over by her town and spilled all the boxes of apples!  They were signaling people to stop and telling them they could have as many as they wanted for free, so she got 2 big boxes. 

Although we live 70 miles apart, we just happened to have lunch the following day at our "in between town", so she brought them to me. Hurray.. I LOVE free stuff! I had to make chucky style as can't find my big stainless strainer that I always used to use to make applesauce. Really though, I love the chunky almost better. NO sugar added either.....

So that's what I've been doing (and eating)!!! 

Until next time...............

~Marilyn~