Showing posts with label thrifty frugal. Show all posts

Sunday, January 26, 2020

What my "roll" was all about.....

I'm finally getting a chance to do a (hopefully) quick post on the things I made right after Christmas when I was on my "roll" making stuff! I had so much fun and couldn't stop. Trouble is.. I didn't take as many pictures as I thought I did. But I think you'll get the idea.

The first photo that I showed on my last post, was a pile of Christmas card boxes.

I've been having a blast making all sorts of things from Dollar Tree Christmas cards! You get 18 cards in a box for $1.00 (here in Oregon) and they are mostly 5x7 cards and really nice quality.

I made all sorts of little post it note books and photo frames, which I showed on my blog post dated December 10, 2019 HERE.  Those were all given away as gifts. I also watched a gal on YouTube who was using the cards to make die cut embellishments, so away I went! I spent hours die cutting.  I have a Sizzix cutting machine and used my fancy oval dies, some star dies and a little lantern die to put together a cute lantern. I also cut some florals and doilies. I will use these on next year's cards. I mean.. the boxed cards are really pretty as they are - but that is too easy to just send out those!


These are some of the cards - so very pretty!


I cut some of sentiments on the insides of the cards, into fancy ovals.


So now I have the idea to go to Dollar Tree, and see what other cards they may have.. I don't think they have Valentine's Day boxed cards, but you never know!  

Next... my post showed a pile of Christmas fabrics. Here's what I made:


Draw string fabric gift sacks! I had used up all the ones I previously had in my stash. My sisters and I each try to make some fabric gift bags each year, and then they get passed around with gifts inside. This year, I didn't have very many (which sister hoarded them???) so I wanted to make some for next year. So I made about 15 gift sacks from Christmas fabric I had bought.  I also scanned in the fabric to my computer, so I can print it out as paper for cards or boxes, etc.  

It was such pretty fabric! I had bought it originally to make some fabric Christmas pumpkins.... yes.... pumpkins. I finally made a little fabric pumpkin AFTER Thanksgiving, and loved it so much, decided I'd make some with Christmas fabric.


But grand ideas just don't come to fruition sometimes, do they? So instead, they became gift sacks. Maybe next year I'll get pumpkins made BEFORE Christmas! As my mom used to say: "a day late and a dollar short"..... that's me.

I decided to make some of the red Christmas fabrics into Valentine's Day gift bags. I added some pretty floral fabrics and bows and lace.


A friend had given me some pretty Christmas fabrics, so that's what got me onto the roll to scan fabrics into my computer. I printed out some pages from the fabric paper, and made a bunch of Christmas tags. I then made up each piece of her fabric into a gift bag for her. So she got 4 gift bags and some matching paper tags for each! I forgot to take pictures of those sweet bags, but they were darling. She had purchased the fabric from the local thrift store.

Here's the fabric scanned:

Fabric that is now paper I can print out as many times as I want.

The cutest fabric - what cute cards I can make next year!

This made the cutest gift tags!  I made a TON of Christmas gift tags and gave them as gifts to everyone.
I have a new "all time favorite" on YouTube. Her name is The Posh Paper Lady. She is who inspired me to make many of my little gifts using the Dollar Tree Christmas cards. She also had a video while ago entitled Sweet Little Bags and I've made a ton of those darling little bags!  The finished size is 4-3/4" x 7-3/4" and they are the perfect size for so many gifts. There is also a little gusset on the side so something a little thicker can be put into the bag. 

I made this sweet little bag and tucked in 3 of my handmade Christmas cards, with envelopes - great gift!
The gusset on the side of the bag enabled me to put in candy bars or thicker items. I used my fancy cut scissors to cut along the top edge, and mostly use a little gold binder clip to close the sack. On some sacks, I punched holes on the top and strung ribbon through the holes and tied a pretty bow.


I got an idea in my head to buy some cheap (but nice) wrapping paper that I saw at our local discount store, and make some of my own little pink gift sacks to use to package my Etsy shop items. I just happened to see this pretty pink flocked paper at our local discount store.  It was $1.49 for 2 large sheets and I could make 8 bags from it.


And while I was at it, I made myself a new "logo" sticker to put on the front of these sweet little bags. I printed it on regular paper and vellum paper. I like the vellum (see 2nd photo below) as you can see the pink through it. Which one do you like?......the one printed on the vellum or the one printed on regular white paper, with the white border around it?  (Note: I did somewhat copy this logo from The Posh Paper Lady. Although I'm frilly and "girly" I loved the simplicity of her logo tag. Of course, I had to add some flowers to it!)

Some of these I will decorate with other embellishments I made, and paper flowers.

Vellum on the left, plain white paper on the right. Which one?
And while I was on a roll making these sweet little bags, I made a few larger flat fold gift bags from my older Christmas papers, plus some little post it note holders.

I LOVE this truck paper. I think this was my last sheet.

These hold 3x5 post it notes that I got............ where?.............yup............The Dollar Tree!

Hand doodling made it more fun.

And while I was using some of my older papers, I made a "rosette Christmas tree" - I found the video on YouTube, but now can't remember who it was. There are several tutorials out there.


The bottom "mat" is a crocheted doily I made last summer - I made several that are red and white or green and white, to use over the holidays.
In between all my making and creating, I've managed to put quite a few hours in working my (part-time) job for an attorney here in town. I only work from my home and mostly do his billings, but somehow he talked me into doing some HUGE projects of organizing large files and writing down all the work he did on them! It's horrible and I don't like it! I may have to put a "nix" on that type of work as it cuts into my crafting time!

I've made a few other cute papercrafting (larger and more time-consumming) projects, but I'll save those for my next post. This is long enough!

Have a good rest of January everyone! Oh... and my tree IS down and decorations put away. Phew............

~Marilyn~


Wednesday, April 11, 2018

Slowing down....... but still on a roll.......

Just stopping in for a quick wordy as usual post! It has been a very busy week, but I've managed to make a few of my "fabric boxes" that I saw on YouTube. They are so fun and so neat!

I'll jump right in and show you the first one I made.


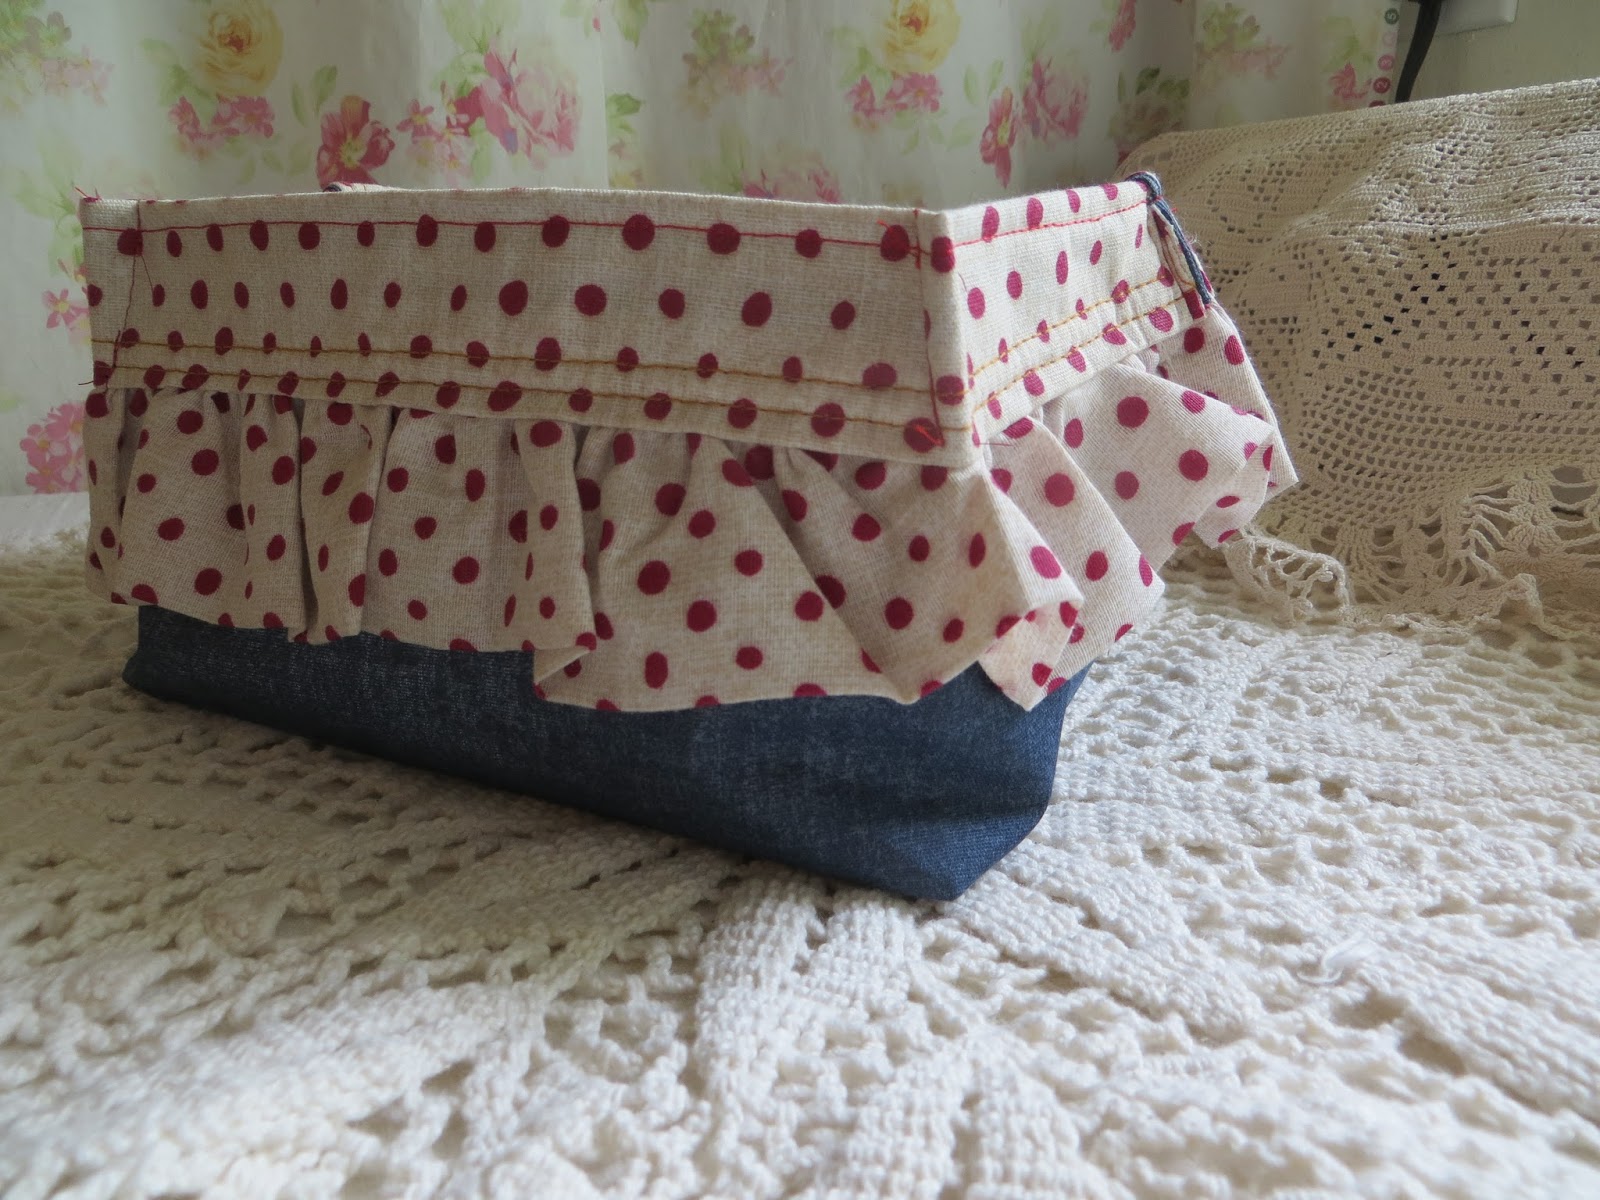
Isn't it cute? The funnest thing is that these are all made with quilted or fabric (heavy) placemats! Yes... placemats! So easy, so quick. I'm addicted, but can't find any more of the kind of placemats I want to use at the thrift stores around here. I've scoured every one. This is a great quick, easy and thrifty project. 

No putting on binding, no quilting, no sewing on the ruffle!  I bought this sweet little placemat (above) at Wal-Mart. It's a Pioneer Woman placemat. It came all lined and with the cute ruffle at each end.


The polka dot "lining" is inside... I did make a little tuck in each corner so that it would be a little sturdier. This mat was fairly light weight but did have some sort of stabilizer inside, so it stands up fairly well.
The video I watched is by Lorrie Nunemaker and can be found here.  She used the cutest Pioneer Woman placemat with pom poms on it. They are SO SO EASY. I mean, it takes about 5 minutes to make one, if you don't get all fussy like I do. I always have to tweak it somehow or add something, like this one:

I added some lace to the top and gathered the edge, as the fabric was not very stable. It was very floppy. And, this was not a placemat, but was a square table mat, about 22" square, and really was too big and too floppy. I was trying to tweak it enough to stand up on its own, but needed to add some pelon or stabilizer inside.  I sure love the fabric though!


It stood up OK after I filled it with some towels. Now if I had a nice big bathroom with alot of counter space, this would really look cute. But I don't... no counter space whatsoever, so not sure what I'm going to use this for. I was experimenting and added some cardboard inside so it would stand up better. If I were to keep it, I would probably make some sort of liner for it, covering it with a pretty fabric to match.

Cardboard added inside... not really a "finished" look at all..... just experimenting.
These next two were two placemats I got for 25 cents each at the thrift store. I wasn't sure they'd work, as again, they were very floppy and not lined.. but thought I'd give it a try. I couldn't stop making them! 


You can change how tall they are by turning the edge down further.


Perfect for cans of tea or little towels.


The fringed edge was at each end, so that when you sew it up the sides, the fringe becomes the trim on the folded over edge. Pretty nifty!  You do have to kind of shape them so they'll sit straight and not kind of fall in on themselves.... but..... I think next time I may put some sort of a stabilizer on the back, even though it'll take a few more minutes.


And of course, I COULD make my own placemat and then make the "box".. but that kind of loses the point of this being a quick and easy project.  It's so great for little gifts.

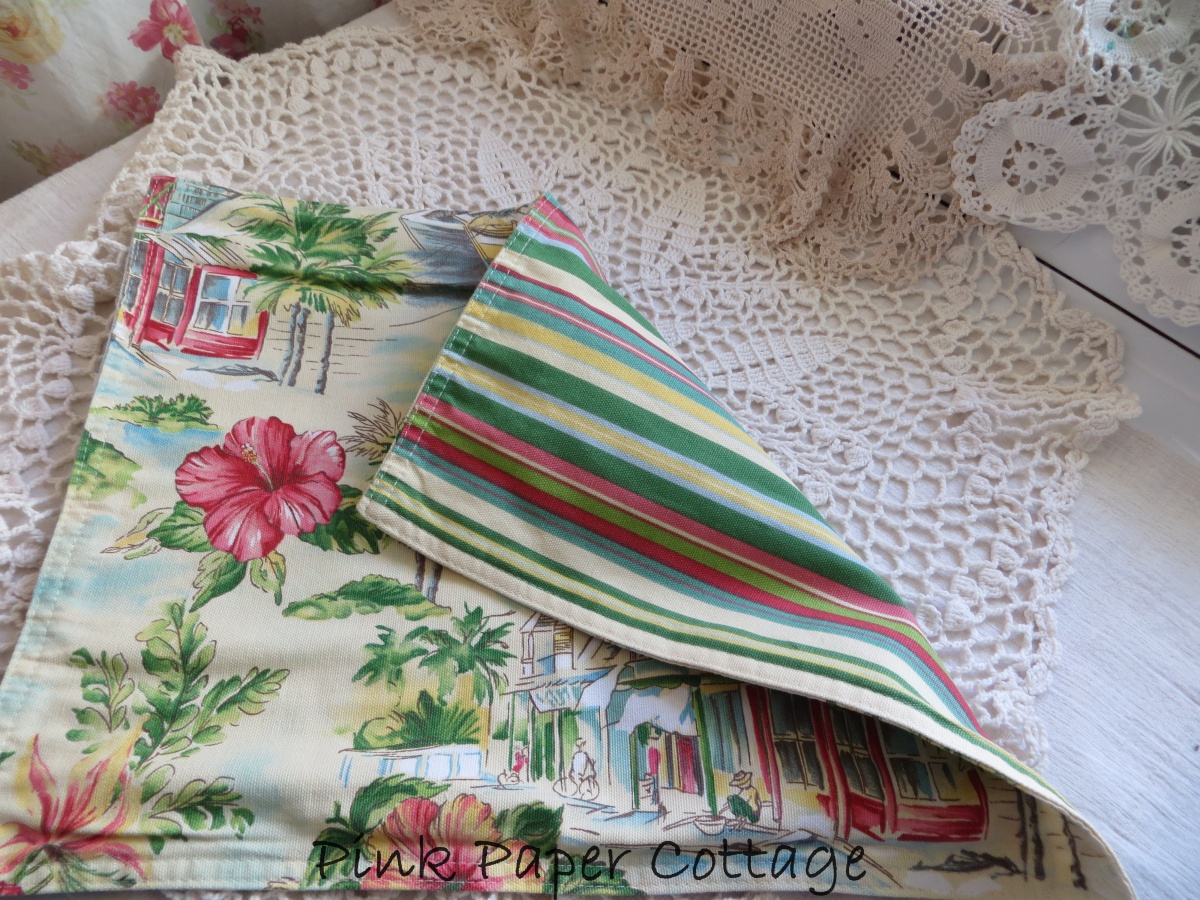
I have one more to make.. I found this at another thrift store in the next town over.. you'd think they'd have tons of placemats! but they didn't. It's very floppy so will definitely add some stabilizer to it with another pretty fabric on the back.. although I DO love the stripes on the back.. as they will be the turned down part.


Look at this cute towel a friend gave me. Has nothing to do with fabric boxes, but I used it inside one of them, and it reminded me how much I love it.. with that darling crocheted edge.  Hubby loves biscuits and gravy!


I'm still trying to finish up my second set of placemats! I'm so bad at finishing things if I lose interest or move on to something else... and right now... it's looking for more placemats to use! But then... what will I do with all these fabric "boxes"??? I have absolutely no counter space or dresser tops or table stops left in my house. I'll figure out something............

Have a Blessed Day..........

~Marilyn~


Friday, August 18, 2017

It's still a little wonky but it's done!

It's done! It's done! she cried in excitement! My old blue hutch has her new (many) coats of white..... uh.. I mean FIVE coats of white.......


Here's the old tired ugly girl BEFORE I got started (above).  But nothing that is vintage is ugly right? Just needs some TLC..........  Below is after first coat of white spray paint. I had to put paper on the house as this thing takes about 3 people to move it.. and I had it right where I wanted it so wasn't about to move it again! (I did later level it up more).


I took no progress pictures ... go figure...... it got done in bits and pieces.... a little here... a little there..... ran out of spray paint... got two more cans... but wasn't covering real well.. so found an old can of primer I had that was all chunky and thick.... and doctored it up..... stirred and stirred.... and added water...... and put two coats of that primer on it! Then added two more coats of white spray paint.

So voila! Here she is! I'm been so anxious to get it done so I could show you!  She's pretty "rough"... a little wonky and crooked, but I love her anyway!


She's all dressed up for company.......

New pink glass knobs for the drawers....


Pretty pink hat mailbox that was my hubby's and mine at previous houses.... the I "heart" country banner was from our local thrift store.. just happened to see it as I was walking out the other day.

The "potting shed" sign used to be on my fence above that yellow bench I painted last year!  but hubby decided it should have a new home here. It's worn and faded so needs a new uplift (one of these days)......


What a pretty yellow "teacup" to hang on the side... I got it from the lady who gave me the hutch. I couldn't see throwing it away (as she was doing) so grabbed it up. My hubby got me the little green basket to hold my seeds and such.


Those darling birdhouses, yellow candle lamp, yellow bird, mug, two white and pink ceramic candle holders (on top) and flower pots.... also from thrift stores here in town. I want to hang the yellow bird with a little plant in it.


I think I actually squealed when I saw this little pink "ice cream chair" at an antique store the other day (about 20 miles from here)!! Can you believe it was already pink? It's really meant for my garden somewhere, but it looked so cute sitting here... just for a short time... and my little terrarium with the "air plants" just fits there, right? the chair may have to stay.

These are two little air plants I found at the local Fred Meyers store about 25 miles from here. They don't need water ladies! You just mist them every few dayswhen you feel like it, and they are good to go. The gal said they are meant for indoors, but they are dong fine in this 100 degree heat outside. Instant love.  I got the sand and rock pebbles and moss from the local Dollar Tree.. easy deal.

The little chair does look sweet sitting on the ground too, with my new (free) shrubs, thrift find watering can and green tin planter.  Yes, Bi-Mart gave away ALL of their flowers and plants about two weeks ago, right before this big heat wave hit! Most were really wilted and they just didn't want to deal with them anymore, so I got a few Ivy Geraniums (on their last legs), two lilac bushes and two Snowberry bushes, and they are all doing well and very happy in their new home. (Note to self:  tell hubby to remove that horrible ugly black cord that goes up the side of the house to the TV "dish"!!! We don't even have dish TV or anything, so get rid of it!)


There was a big empty hole on the hutch surface top. I think a little door used to be there.... so I added a little curtain to cover it up... tacked on with decorative tacks.. and now behind it I can store my little not so pretty (practical) things.  I stacked a few garden books with another little tin planter hubby found for me.. and bought a little cactus to put in it..... the pink birdy is compliments of the Dollar Tree... and the little aqua blue jar holds my plant fertilizer!

So here she is in all her glory! She's too pretty now to use for a planting table, isn't she? 


I had so much fun decorating her. And yes... I really HAVE used her as a work bench for planting my free plants from Bi Mart. The surface gets dirty but I just let it dry, and then sweep it right off. 

Of course, when it rains, I'll have to take a few things in! And in the winter, I'll remove everything and tarp it for the winter. But for now.... she's such a joy to look at..........

OTHER GARDEN THINGS:

I found a few more darling goodies for my garden at that antique store about 20 miles from Madras... I'm going to place them throughout my tubs and pots of flowers....... and I actually NEED the watering can for my front flower pots.


I think the pink chair might have already found a home at the hutch! (Rudy loved that chair.....) The galvanized watering can was in perfect condition... no holes... no rust.. for only $10! I was thrilled.

The little red bench/chair I just had to have.... just because it was so cute.... and the lid comes off to store goodies inside.... it'll sit amongst my flowers somewhere... and the chicken wire frame... already hanging on my fence!

And our "catio" is almost done! More on that soon............

Have a nice week everyone.... the solar eclipse here is fast approaching... and I"m dreading it to say the least.. our little town of 6,000 people is supposed to grow to close to 200,000 people.. who are all coming to view the (2 minute) total eclipse! Oh boy..........

Hugs to all............