Saturday, April 23, 2016

Saturday Serenity - April 23, 2016

Go in the direction
of where
your peace
is coming from.

~C. JoyBell C.~


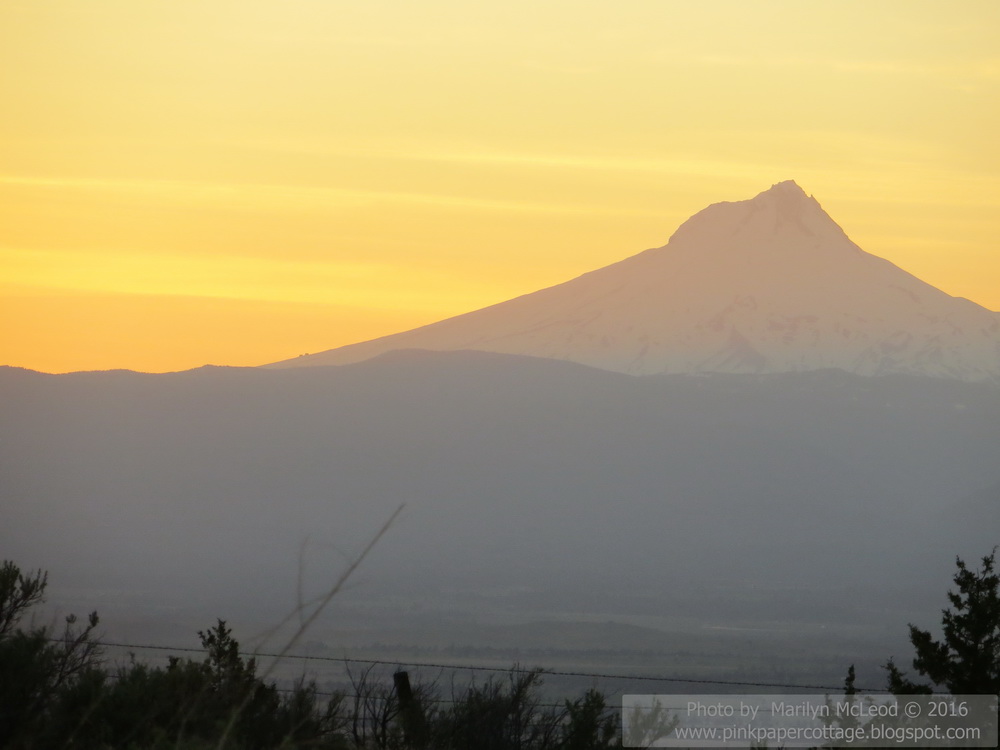
These (untouched) photos were taken on April 18, 2016 and are of Mt. Hood (and lower foothills to the south of Mt. Hood) to the west of where we were driving, between Maupin, OR and Madras, OR on Highway 197.  This is a stretch of very remote highway that makes me feel very serene every time I go there. I don't know why. It is both beautiful and mysterious. I can't help but stop about every mile, get out of the car, and gaze down into the canyons and off into the distance. I could sit there for hours and contemplate life and the beauty of nature. 

 photo Blogsignature2smallersizeforblog_zps20ad3d10.png

Friday, April 22, 2016

Double box card kit and other projects.

Even though I haven't posted too often lately, I really AM busy making stuff! I don't know how life can be so busy when I'm supposed to be retired!

Here are a few things I've made. If you want a tutorial on any of them, please post a comment and let me know and I'll be happy to do a tutorial.

MINI JOURNAL BOOKLET FROM 12X12 SHEET OF PAPER:
(There are many YouTube videos out there on this little pocket album - search for "pocket mini album using one 12x12 sheet of paper".) I've been meaning to do a written tutorial on this but so far just haven't done it! let me know if you want one.


This is a little envelope that is open on the top that slides into one of the pockets.


This little album mostly consists of journal tags, but a person could also add some photos in the pockets.


"YOU'RE TWEET" CANDY POCKET:
(From Pootles Paper Craft Watercolour Chick Treat Bag video tutorial on You Tube).


I slipped two mini Peppermint Patties inside, punched a hole in upper corner and tied this onto a gift to use as a gift tag.

CARD KIT IN A DOUBLE BOX:
(Anna Powell on YouTube has two wonderful videos Card Box Part 1 and  Card Box Part 2. Very easy to follow and so fun to make!

This is a good sized box - holds two sets of A2 cards, side-by-side, or one side holds the cards and the other side holds embellishments for the kit. The box is about 9" x 11".

On the left side, I have put in eight cards and envelopes. The right side is divided into two sections to hold tags and embellishments.


I made four each of two kinds of cards that have a watercolor look. I got these free watercolor wreath printables from the website Free Pretty Things for You, go to her webpage here, and The Cottage Market, go to the webpage here. I mean.. it looks like I did the watercoloring right on the watercolor paper I used! Her artwork is awesome!


Their wreaths had quotes inside, such as this one:

but I opted to just use the wreath and erased the quote from the middle using my "Paint" Program.

This watercolor flower bunch also came from Free Pretty Things for You as a free printable download called Spring Watercolor Floral Spray.
 

I added lots of little goodies and embellishments to make your own card, such as sentiment labels, tiny bows, vellum butterflies, and some goodies from a Becky Higgins Project Life "130 pieces kit". 

BRIDAL SHOWER VINTAGE CARD:

I used some GORGEOUS DCWV Papers from the Midnight Berry 12x12 paper pad, some gold glitter paper, a doily that I inked with dark brown and a photo made to look vintage, of my dear soon-to-be niece-in-law!


This girl really has been busy! These are not all of the projects I've been working on!. I also managed to go with my sister to a weekend scrapbook retreat here in Madras. We had a great time!

Let me know if you would like further instructions on any of these projects.

   photo Blogsignature2smallersizeforblog_zps20ad3d10.png

Friday, March 25, 2016

Thrifty, frugal quick Easter cards!

I live in a small town and it's 30 miles to the nearest craft store. I decided at the last minute this week to make some simple little Easter cards for my step-granddaughters. Hum.m.m.m. no Easter paper, nothing with Easter bunnies on it and no Easter stickers or anything! What am I going to do?

I sure don't want to drive 30 miles one way for a couple of little pieces of Easter scrapbook paper!

Dollar Tree to the rescue.  I bought a little bag of 10 tiny 2"x2" sticker boxes for (of course) $1.00! I figured I could cut off the little fronts and backs and use them to decorate my cards.


 So I got together a little 6x6 book of patterned paper from Echo Park - I Love Sunshine, some different colored 5-1/2" x 5-1/2" plain cards that I'd gotten on sale a few years ago, my dies for cutting labels, my corner punch and some clear Stickles........... and went to work!

I needed to make 5 cards,,, even one for my son which had to be masculine. I began by corner punching the little 2x2 pieces I'd cut out, with my decorative corner punch. See top left below. Then I printed some Easter sentiments on my cream cardstock with pink color, and used my Hot Off the Press label dies to cut some labels for the inside. (See below)


I picked some pretty and bright papers from the Echo Park pad, cut them to 4-1/2" x 4-1/2" and adhered them to the front of each card. There was a little extra strip left for the inside.

I made a little label with the die, and use my tiny alphabet stamp set to stamp either "hop hop hop" or "peep peep" on little labels and a circle.

I put Stickles clear glitter in places like the bunnies' ears, chick's tummy, eggs, and on the labels around the edge.


These were SUPER QUICK and fun and easy to make and cost me the total sum of $1.00. I had just purchased the corner punch at JoAnn Fabrics with my 60% off coupon and was anxious to use it. It makes a plain square of paper look pretty fancy don't you think?

Here are the 4 feminine cards.

And I even made one for my son (who is my "baby" at 37!). I used some woodgrain backed paper from a Simple Stories Vintage Bliss 6x6 paper pad, added a couple of the little box tops to the front and a few stickers of the eggs, and I think it turned out pretty nice.. even for a guy.

If you don't have a Dollar Tree nearby, maybe another discount store or even the bigger box stores would have little packages of treats like this to use... especially if you're on a budget like I am. 

On the inside of each card, I put the little stickers that were inside the boxes, two little plastic butterfly stencils (again from the Dollar Tree), a piece of cardstock to draw on and a little notepad. So I guess the total cost for each card with the stuff inside was $3.00.

Think outside of the box when you're in a pinch and don't want to make the long drive to your craft store! Have you ever been in this situation and made do, and got a little creative with what you already had or could get for super cheap?

HAPPY EASTER TO YOU ALL!

   photo Blogsignature2smallersizeforblog_zps20ad3d10.png

Tuesday, March 22, 2016

Unusual 3D Photo Display using cardstock.

If you don't watch Sandi Genovese's video tutorials, you're missing something! She used to have her own TV show in the mid-2000's that I couldn't get enough of! She is such a multi-talented artist and educator, and so very original. She performs papercrafting miracles of all kinds. I so admire this lady!

I recently followed one of her vidoes (link below) and made the unique little "3D Photo Display" that she taught.  Here is hers:

Here's mine. Of course, I had to make it a little more "shabby" looking.


You can go to this link for the 3D Photo Display on Sandi's website where the video for this project is posted. It's so fun and easy and only uses one sheet of 8-1/2 x 11 paper and a few pieces of coordinating paper, plus whatever embellishments you want to use.

You just set the photo on a little shelf (it's not enclosed behind glass or plastic), so you can change it out easily whenever you want! Very ingenious. It would be perfect to place your child's or grandchild's school photos on. 

See the little "shelf" below right? (green).

Easily holds a 4x6 photo, set lengthwise or up and down... or would hold two smaller photos.
I used some little chipboard butterflies and buttons on the bottom, and placed a cardstock butterfly cut-out on the top left, with another chipboard "Photo Op" piece on the top left.

Sandi's signature colors are lots of red and pops of black which she usually puts some white stripes or polka dots on with her white gel pen. Love it!

Accordian file folder of hers.

Quickie Notebook of hers.
I just so admire Sandi Genovese, and I've made more than one of her unique projects. You can go to her website Sandi Genovese dot com to sign up to follow her Newsletter. You'll receive a FREE project tutorial about once a week or every two weeks in your email inbox. If you want to, you can also sign up to be a Gold Member to receive more videos and tutorials.  

Sandi also has a wonderful Facebook page HERE where she posts all of her projects (and you can post  yours).

The most recent project on her website is the Waterfall Card with Tags. Just darling... and innovative.. and I want to make one very soon!  You can find it HERE.
Waterfall Card with Tags.
This is not a paid Promotional post! I just love Sandi Genevese and her unique and fun projects. I have admired her for years, and just wanted to share one of her projects that I made. I'm going to be making some more in shabby pinks to match  my pink bedroom.

Check out her website and tutorials. You'll love them!  Let me know if you make anything of Sandi's. I would love to see it.


   photo Blogsignature2smallersizeforblog_zps20ad3d10.png

Saturday, March 19, 2016

SATURDAY SERENITY - March 19, 2016

(Look at pictures 8, 9, 10, 11 and 12......look closely..........no those aren't rocks!)

Last week I got to enjoy one of my all time favorite things - go to the Oregon coast! I just LOVE the coast.. the smell, the mist, the fog, the sounds of the surf rolling in... there is just something about being there.. it is so calming, so relaxing.. so serene. 

I had a week to myself and I thoroughly enjoyed doing whatever I wanted to, whenever I wanted to.. or nothing at all.
You are the only one....
Who gets to....
Set the rules of your life.
(www.bravegirlsclub.com)

First trip from the house to see the waves.... the house where I stayed was a few miles from the actual water. Can you believe it??? dirty surf! 

More dirty surf - but oh so outrageously wild and beautiful!

Trip up the coast to see the Heceta Lighthouse - it was a bright and sunny day.
 

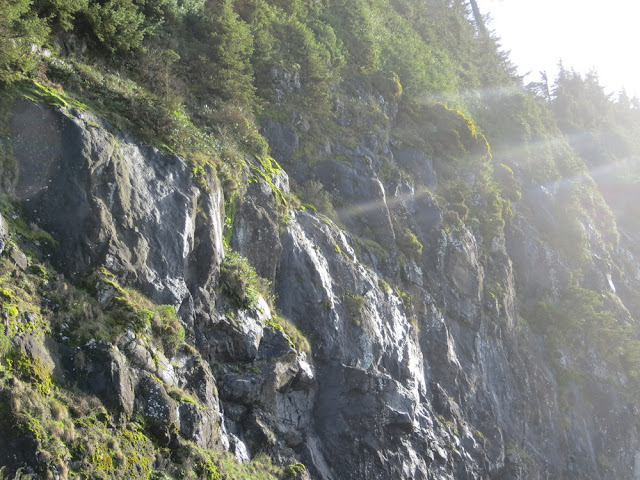
Beautiful cliffs of rocks and moss. Highway 101 is unbelievably picturesque.


Now look at the next pictures. What do you see? are those rocks? what are those things in the water? I could hear it but couldn't see it at first.


Closer look - can you see them? hundreds of them!
 Cavorting in the water and barking.............


Yup you guessed it............... SEALS! Unbeknownst to me, I was just a mile south of the Sea Lion Caves! Wow is all I could say. What a surprise!

Pictures following are Old Town, Florence, Oregon. What a quaint little town with alot of history. I ate lunch in a little bistro on the Siuslaw River and wandered up and down the street, looking into the wonderful shops. (Have I told you yet how much I love the water?)


It was such a breath of fresh air to see some flowers starting to bloom. Where I live, there is NOTHING blooming or even beginning to peek up from the ground yet.

Siuslaw River.

An old fashioned drinking fountain. You don't see those very often anymore.  There's even a spigot for Fido! Growing up in Portland, Oregon, these were on many of the street corners in downtown.

Colorful flags and geraniums!
What a joyful and yet serene week I had. I hope to go back soon. 


    photo Blogsignature2smallersizeforblog_zps20ad3d10.png