Photo of my and signup.

Photo of my and signup.
If you want to subscribe to follow me via Mail Chimp, the signup is in my sidebar or at the bottom of my posts.

Tuesday, August 30, 2016

Around my house... favorite things and updates.

It's been awhile since I've shown some of the "updates" in my new (old) house that we purchased last October. I seem to be decorating with alot of vintage/thrift store (old) finds! Here goes... I'll try to be brief as this post is very PHOTO HEAVY. I love every single thing here... some I've had for years and years.. and some are new to me. Enjoy! 

Little wire basket from Restore (Habitat for Humanity).
Let's start with the master bedroom. I think I've shown most of it since we painted it pink last Fall, but here are a few new things:

LOVE my china teacups... most were given to me as a child by my godmothers... and they are lovingly placed on my mom's cup shelf that she had in her house for many many years. I hope to paint this shelf white one of these days.

New old picture from a thrift store... how much better could it match my pink bedroom? And more of my mom's china plates.


My mom's china plates over our closet. Love the ones she had with pink as the main color.

My "what not" shelf for miniatures. I bought this probably 30 years ago.. was rough wood and I painted it white a few years ago. LOVE all of my miniatures that I've collected over the years.
 Next... our master bath:

I LOVE the pale gray walls! It was BRIGHT yellow before I painted. Never thought I would be a "gray" person.. but coming from the pink bedroom, I decided I needed something calmer. This is our new white wall cabinet that my sister got us for a housewarming gift.. I love the little baskets and open shelves.

My sister bought me the little "books" for my birthday, which are really little boxes with lids. Perfect for storing things I use alot but don't want out in sight.  (Oops.. I see a spot of paint I missed over that switch plate!).

These "fish china plates" were perfect for the bathroom. They were my dad's that my mom gave him over the years (they are both deceased now).......... and though he had about 20, I only got about 2 from the estate... then I happened to see these at a garage sale my sister was having... she was selling them! can't believe it.... I snapped them up of course.  Also.. love this little "bath" sign that I bought at the Dollar Store.

Pretty little wicker shelf I got for $3.00 at a  yard sale last  year.. painted it white (wish I had a before photo, but forgot to take one). My accent color in this bath is aqua, so found some aqua votive candle holders, and fabrics with aqua in them that I wrapped around my pill bottles and tied with a pretty bow! The little bunnies were my mom's.. they needed a home as had been stored in a box for years.  The "key" hooks I've had for about 10 years and love it. Was perfect here for little what-nots and necklaces.


Moving on......... to our living room.....

This large picture found a home here.... found by hubby from the local Restore.... not totally what I had in mind, but I like it... and the colors are so pretty in our darkish room  The picture to the left I've had for years..... always loved the porch scene... and it was a perfect match here.

Dreamy porch scene... I want one just like it! I DO have a white wicker chair that was my great grandmother's..... but is still stored at my son's house many miles away! Someday................
And now for my most favorite "find" from a recent trip to a garden store.....  PINK shutters! can you believe it????


I bought these for $12.00 at a garden shop...... could not believe the gal there had painted them pink! They were supposed to be for our bedroom... but instead found their home on my side table on the small living room wall that I didn't know what to do with. I can sit and look at this little vignette from my favorite chair, so think it will live here for now.

Above is the short wall in our living room.. one doorway goes into the kitchen and the other end (right end) is open to the dining area. I didn't quite know what to do with it... the white beadboard is NOT attached yet! and sorry about the mirror on the floor that hasn't found a home yet.  I love everything on this wall.. the little antique drop-leaf table that was my aunt's (although it really needs to be in a different spot).... the Victorian lamp on top that was my mom's and her mom's.....the picture in the middle on the wall that is a collage of pictures of my mom and dad..... the "Home" sign (have had for years)..... the PINK SHUTTER of course!.........and the little pink birds on the piece of wood.


Oh my... can you believe my sister found pink birds?? Amazing... she found this at a little shop in La Pine, Oregon called Twigs..... the owners make most of their items.... he is a genius with wood and she is a genius with twigs!


One more thing....


I won these CUTE little squishy squash pumpkins from a drawing at  Embracing Cottage Style. I can't remember which shop offered these for the prize for that month... I really DID try to find it, but can't remember which month I won! They are the cutest little things and decorated so sweetly. If you like "shabby, romantic, french, farmhouse, coastal and retro".... take at look at this site! It's pretty awesome. 

The squishy squashes look so cute in my little wire basket!


Well maybe one more thing.............. a few things in my kitchen:


Love my flowered curtain that  hides our hot water heater! Fabric that I've had for  years.. intended for bedroom curtains but never made it there.  I really do need to find a more vintage looking clock for this spot! 

LOVE this Mary Englebreit tray that I've had for many years.... just didn't know where to put it... but it looks darling on my apple green kitchen wall (see the temp today???)..... that's "cooler" for here!

Little wood fish plaque that I made for my dad 15 years ago. The fish is hand carved. He was an avid fisherman!
Uh..... I was going to show some craft room thrifty finds.. but this is so long I think that'll be in one of my next posts.

Have a great day!  That's it for now.....

   photo Blogsignature2smallersizeforblog_zps20ad3d10.png

Saturday, August 27, 2016

Healthy gluten free apple cinnamon protein bars!

Who doesn't want a quick and healthy "snack" for breakfast? I do! I'm always looking for a good gluten free protein bar recipe... one for a healthy, sugar-free (but yummy) bar I can grab in the morning to snack on while I drink my daily cup of herbal tea. 


By jove, I think I found a really good one! My husband is an avid collector of recipes he finds on the internet, and sometimes I'll try one of his recipes just out of curiosity.  

He has a (huge) 3 ring binder of recipes. I was browsing through his binder today, and saw one he printed out from a website called Anabolic Cooking. It's a website by a guy named Dave Ruel, who is quite the muscle builder (or used to be), dealing with ways to eat for building muscle mass... hubby is always looking for ways to build his muscles so he tends to save alot of high protein and muscle building recipes.

The Anabolic Cooking website promotes the cookbook Dave Ruel wrote, called The Anabolic Cooking Cookbook. I just wanted to try this one recipe for Apple & Cinnamon High Protein Muffins. It sounded pretty easy to make, had no sugar in it, and lots of other healthy things, like oats, oat bran, flax oil, protein powder, eggs and applesauce. hum.m.m.m.m sounds good don't ya think?.... plus looked quick and easy.


I'm not into muscle building(!) but would rather have a high protein, healthy snack in the morning with my first cup of tea, rather than a high carb bowl of cereal or something like that, and that's what this recipe sounded like.  So off I went to the kitchen!

So here's my take on these Apple & Cinnamon High Protein Muffins. Of course, they weren't gluten free, which is all I can eat, so I changed them up somewhat, and I made bars rather than muffins (as much easier to wash a baking dish than muffin tin - I HATE washing muffin tins for some reason!).


GLUTEN FREE HEALTHY APPLE-CINNAMON-OATMEAL-RAISIN PROTEIN BARS
Bake at 350 degrees for about 30 minutes.

If you don't have to eat gluten-free, then you could use "normal" oats and regular flour, etc.

Ingredients:

3/4 cup of gluten free oatmeal (I use Bob's Red Mill)
1/4 cup of oat bran (I didn't have any, so used some ground up gluten free rice krispies)
1 tbs. gluten free coconut flour (plus an added 1/8 of a cup as the batter seemed too thin to me)
4 eggs (it called for 6 egg whites, but I used 4 whole eggs instead)
1 scoop Vanilla Protein Powder (I used "Pure Protein" 100% Whey Protein Powder - it does contain a very small amount of sucralose, which I don't like but it's all I had)
1/4 tsp. baking soda
Dash of salt
1 tbs. organic Agave sweetener (it called for Splenda but I didn't want any artificial sugars in my bars-yuk)
1 tbs. Virgin olive oil (I added maybe another tbs. as I wanted them to be a little more moist)
2 tbs. softened butter (my own addition for moistness)
4 tbs. unsweetened apple sauce
1 tsp. cinnamon
1 tsp. vanilla extract
1 peeled and diced apple
1/2 to 1 cup raisins (optional, but they do add some sweetness)
1/2 to 1 cup nuts (optional)

Directions:

1.  Blend all dry ingredients. I used a whisk. Then add wet ingredients (do not add apple pieces or raisins, nuts, etc. until everything has been blended with the mixer) and mix very well with an electric mixer. Then add apple, raisins and nuts.

2.  Add the apple pieces, raisins and nuts and mix in with a spoon.

3.  Poor batter into a buttered or oiled 9x9 baking dish.

4.  Cook for approx. 30 minutes at 350 degrees. Check with toothpick at about 25 minutes so you don't overcook.

You could make muffins if you wish. Also, I think these bars or muffins would freeze well, and then microwave one when you want a quick snack.  (NOTE TO SELF: Make a double batch next time as 2 days later, they are already gone!)


The original recipe from Dave Ruel can be found HERE.

Don't these look pretty yummy? And they WERE! Hubby and I just had to try them, right?

Perfect to have with my cup of tea in the morning.... and here's a note.. if you've never tried Stash Tea's Meyer Lemon tea, you HAVE to try it! If you love the taste of lemons, then this tea is just the most awesome lemon tea I've ever tried, and I've tried alot of them.

Well.. that's my excitement for the day...... I'm already looking forward to my tomorrow morning cup of (lemon) tea with a super healthy protein bar!

Enjoy!


   photo Blogsignature2smallersizeforblog_zps20ad3d10.png

Thursday, August 25, 2016

Pretty paper purses.

Since I've spent the last two three weeks mostly sitting with my leg up due to a recent fall, I've had time to craft... and it's been fun to try a few new things.


I've wanted to make one of these darling paper purses for at least a year! I'd seen a similar one on a few YouTube videos, but the instructions were hard to follow, and honestly? they seemed like too much work! Then I saw a video on the YouTube channel May May Made It Crafts and she had a really easy-to-follow video. This uses one 12x12 sheet of paper, plus a little bit of a coordinating paper.  

You should go check out May May's channel.... I just love her... she's such a kick.... and I love her accent (she's from Alabama). I've watched her since she had maybe 100 subscribers, and now she has 65,000 plus subscribers! She designs her own stamp sets now and sells them on her website May May Made It, plus many other of her most favorite tools and supplies (and I'm not getting paid to promote her.. I just love her!).


This purple and black one is the first one I made, kind of a test run so to speak, so I didn't use really gorgeous papers...... so after I finished this one, the next day I just HAD to make another one using some really summery/fall papers (scroll down to see it).  This was so fun and easy to make. Some of the other YouTube gals have made this same design, using gorgeous shabby papers (which I love).. and used lace trim on it which I also love! 

I crocheted the little flower on it.... and I used a 1-1/2" strip of paper for the bottom trim and used one of my decorative edges paper punches to dress it up a little bit. The next one I made, I used lace for the trim. You know me and lace. We are best friends!
I used velcro dots for the closure, but you could also use magnets or tie it closed. The finished size is about 7" wide by 4-1/2" tall.

My next one had to be a little more "shabby" and be ready for Fall decorating.


Oh my! I'm smitten with these! I used some very old peach eyelet lace that I had in my stash (from the 1970's) and some pretty autumn colors scrapbook paper from DCWV Project Stacks DIY Mini Albums. I glued vintage gold buttons at the bottom of each handle, front and back.


Here's the back. Isn't the paper so pretty? And love my double bow using some Dollar Tree peach chevron ribbon. I found a great tutorial for making double bows by Jak Heath. You can find the YouTube video tutorial here. You don't need any sort of tool.... just use your fingers which is so neat.

I used a big old vintage button on the flap, and tied it shut with ribbon instead of velcro. I think I like the velcro better... is much easier to open and close.

My hubby suggested I use it for a table centerpiece, with autumn colored leaves or flowers... so I immediately had to run to the Dollar Tree and get some pretty fall leaves!  I love how it looks with the leaves inside, and right now, it's sitting on our fireplace mantle. Oh hubby can come up with a good idea now and then! (sh.sh.sh.sh.sh  don't tell him I said so). I thought of using this for a little gift "box".. not as a centerpiece! ... but I really like it to use as a decoration.  Now I can picture a Christmas purse with holly and berries, a Halloween purse with tiny pumpkins on sticks... and so on and so forth..... for centerpieces on my dining table, or decorations for my mantle.


These little "purses" would also make sweet little gift "bags" to hold little notecards, soaps, candles, candies or soft goods. I put some fabric "fat quarters" in this one and it held about six with ease.

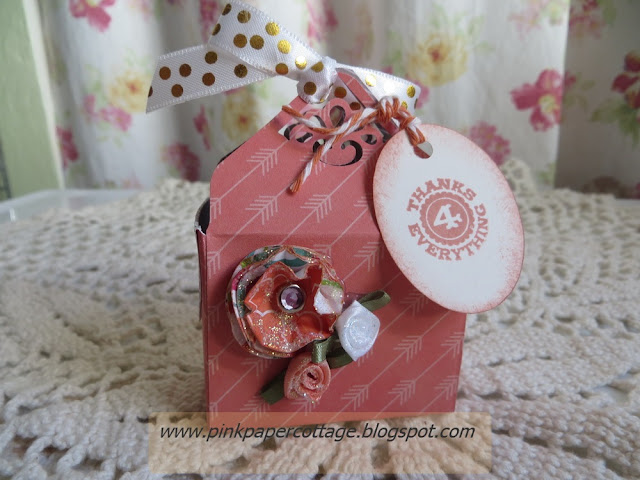
And since I was on a roll with "boxes", which I LOVE making (don't ask me why)........... I found a tutorial on some cute little gift/favor boxes using the WRMK (We are Memory Keepers) envelope punch board.  Oh how fun these were to make! Quick and easy and so fun to decorate.

Such a cute little box.. a mere 2-1/2 x 3 inches but oh so sweet.
I made three just for the pure joy of making them!  Here's the YouTube video by Dee Slater if you would like to make one.


Use 6x6' double sided papers..... see the little flap on the side? that is the reverse side of the paper. This one has cute bicycles on it.


........ and I thought how cute they would look on that table centerpiece idea that hubby came up with!


I'll be back soon with more projects! I'm trying to take advantage of my "down" time, although my knee is a little bit better. I can actually put some weight on it now (hush.. don't tell hubby....he's still waiting on me "somewhat" )!!

   photo Blogsignature2smallersizeforblog_zps20ad3d10.png

Saturday, August 20, 2016

Saturday Serenity - August 20, 2016


I'm in my element this summer with my gardens and flowers!

Have a simply serene Saturday.......  and thank you all for your lovely comments... I just love all of you!

 photo Blogsignature2smallersizeforblog_zps20ad3d10.png

Monday, August 15, 2016

Idle body....... busy hands.......

Since I've spent the last two weeks pretty much SITTING with my leg up.....(because of my fall two weeks ago), I decided it's a good time to play with all of my crafting goodies that have been gathering dust on my shelves this summer! Maybe try a few new things and projects........ maybe make a few things for my Etsy shop.....maybe bake something new (well. that was kind of hard to do but I made one attempt with limited success - more later on that).  

I've been glued to YouTube much of the time, getting ideas for new cards and projects. Would you believe I have 826 videos "liked" that I want to make???? Don't think I'll get those done in a lifetime, do you? It's just too addictive watching YouTube crafting videos.... that's all I can say.
 
I got this pretty Bo Bunny 6x6 paper pad on sale at our local Bi-Mart, so decided to make some quick little cards.  Hum.m.m.m.m and gee....do you think I bought it because it matches my flowers?


I found a video for some "quick" cards showcasing some Stampin' Up designer papers, although my cards didn't turn out so quick. I just can't seem to "do" quick.  Here's the link to the video by Jackie Bolhuis.  I loved how she took just 4 pieces of paper measuring 4 x 5-1/4", cut them up, and turned them into four pretty cards (you also needed the card bases) - I used white ones.

Here are my 4 cards:


Here is one of Jackie's cards (below). This card does not match her video, as I couldn't find a picture of those cards are her blog.. but this one below is very similar to her video as far as design.


Her video cards had doilies on them, but of course, I had to MAKE my own doilies! (used my Cricut cutting machine which I haven't used for months)... and also cut out the words, rather than stamping them (which is so much easier and quicker)! I did stamp one card and just used scalloped circles which can qualify it as a "quick" card.. the rest.... not so quick.

Here's the quick one.
The following ones I made my doily using the Cindy Loo Cricuit cartridge with the little bird on it, and I made the Thanks and Thank You with that same cartridge.


I put clear Stickles on the blue word that I cut out with the Cricut.
Matchy matchy flowers!

I used some silver paper for the words - so pretty! Gots to have some glam, right?


Aren't these cards just yummy and summery??  Love them!  Speaking of yummy, I just discovered a neat website called "Yummly". It's really neat with thousands of recipes. More about it in one of my next posts!

In the next day or two, I'll show you some of my other projects - I'm having a grand time, and having an "excuse" to craft, rather than go outside and work in the yard........ is kind of fun! (although I have still managed to get outside, crutches and all, to water and do a little weeding). Bad girl.........

   photo Blogsignature2smallersizeforblog_zps20ad3d10.png