Friday, February 3, 2017

More eye candy......

I've had more fun this week making what I call "mini" albums.. but they are really more like little journal/tag albums or instagram photo albums. Although I don't "do" instagram, these little albums are perfect for small photos or instagram photos, which I understand are about 2x2 inches.

I seem to always gravitate towards making "small" things, such as little mini albums, little tiny boxes, tiny accordian albums, etc. I mean, a tiny one is just as much work as a large one! But I love the small things and miniatures. These following two albums are "one sheet 12x12 pocket albums".  There are many You Tube videos out there on making little booklets or albums from one 12x12 inch sheet of paper. This is one of my all-time favorites!


I was making these just for the fun of it. The two pocket minis I started over two years ago! I had the basic little album made, but needed (and wanted) to decorate them with some of my pretty vintage papers.... and then they turned out so cute, I decided to put them in my Etsy shop. The links to each one are at the end of this post.

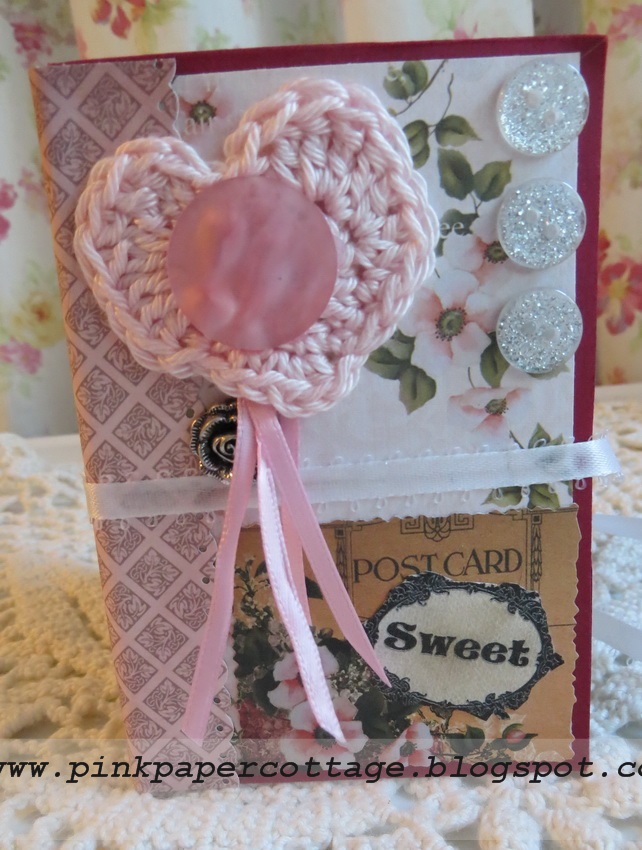
More pictures of my "Sweet" pocket mini, full of at least 20 little tags and tiny photo mats: (these little pocket albums measure 3" x 4-1/2" tall and have 8 pocket pages.


There are two "secret" pockets at the top of two of the pages, that hold pretty vintage tags.


One of my pink crocheted hearts and a vintage pink button.


This next pocket mini, "Live Life in Full Bloom", turned out adorable, using some of my older hoarded scrapbook papers. I love how it turned out (same size..... 3" x 4-1/2" tall).  It also has many tags, I think about 26 or so and some little photo mats, with the two "secret" pockets at the top of two pages:


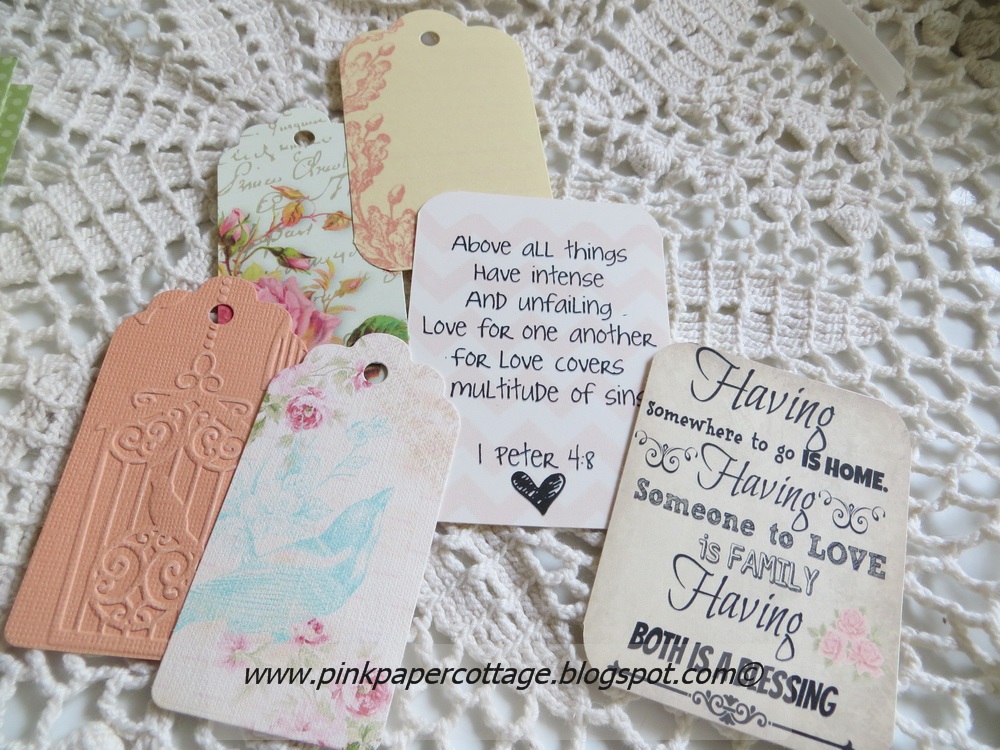
There are 5 quote tags. I found the quotes here and there online and printed them out and then cut the tags out with my Sizzix die cutting machine. Love that machine!
 
Of course I had to add some touches of lace!

I made the "Cherish" tag several  years ago, by using a rubber stamp and stamping it on a brown paper sack (after crinkling it up).. and then I scanned it into my computer to make paper I could print out, and then cut tags from it. 


Some of the tags have a Parisian flare, with the birds, and Bonjour and Post Card. These were cut from some free digital paper from "Free Pretty Things for  You". She has wonderful and awesome free digitals!

The peach colored tags I dry embossed first with little bird cages, and then cut the tags out.
My "big" album (all of 4-1/2" by 6").... comes with it's own little box wrapped with red tulle! I call this one my "Kiss Kiss" album. ........ this is a more traditional album with room for quite a few 4x6 photos. I LOVE the touches of gold here and there in it:


I made this to be more of a "photo album" with many empty pages ready for 4x6 photos and 5 photo mats tucked into side and top pockets. There are also ALOT of tags... I can't remember how many, I think around 30! The description of this album in my Etsy shop will describe the album more and how many tags it has. I didn't make all of these tags... I used some for a collection from Becky Higgins Project Life Lucky Charm collection.  


This is a "photo mat" tag that pulls out from the criss cross pocket page in the middle of the album. Love it! Love the gold.... and see the pink horse with "wild thing I think I love you" on it? 


The larger photo mats.. I think there are 5 in all.

For fun, I made two little vellum envelopes to hold a secret tag to write on, inside.


Tickets and tags!

This is fairly thick, and held together by an attached ribbon that ties into a pretty bow.
So... there's the three little albums I made so far. I'd like to finish two more that I started. One is black....hum.m.m. wonder what I can do with that one? Maybe shabby grunge? 

In case anyone is interested in tutorials for this 4x6 album, the main base album was on Bexswanson's channel right here.  The center page, with the neat criss cross pocket (which page is made with one 12x12" piece of paper) can be found on RoxyFur's channel here on You Tube

 FYI.... I made this sweet little square mini album awhile back, which is also in my Etsy shop.  It's my "Love Notes" album. Very sweet. I think it's about 4" x 4" but not positive. My Etsy description will show the exact size.  On this one I did use a black base and I really like  how it turned out.


Well ladies.. that's what I've been up to this last week, besides scanning fabric and making cards! I'm on such a roll now.. I don't want to leave my craft room. 

Here's the link to my Etsy store (MyPinkPaperCottage).  Click on the "Paper Mini albums" to the left at the top to find all of my albums. 

I'm sorry this was so long, but I just had to share!  

Have a great weekend!


  photo Blogsignature2smallersizeforblog_zps20ad3d10.png

Thursday, February 2, 2017

Turn fabric into paper!

A couple of weeks ago, I gave you a sneak peek of a project I had started working on.  It was in my "Will it Ever Stop?" post on January 12th.  See?  I had this pile of fabrics and I was doing something with them.


Well... I got my projects done, at least some of them.

I was on a roll that day, scanning some of my Valentine's Day scrapbook papers onto my computer, so that I could reuse the papers and print them out over and over again. (I'm frugal that way). I always forget to do that. I loved this paper and it was getting used up, so I thought, why not?

Those papers were pretty traditional... not shabby or cottage colors that I normally like, and I wanted to make a "shabby" Valentine's Day card... so I thought...hum.m.m.m. maybe I could scan in some of my pretty Valentine's Day and "love" fabrics and print them out as paper. This idea was not new to me or "invented" by me. I've seen people on YouTube scanning in napkins to use as paper, and I've actually taken pictures of some of my different small quilted wall hangings, to use as paper. 

So it began..... I was obsessed with scanning every piece of pretty cottage style or Valentine's fabric I had....... and I spent several hours scanning my fabric from that pile! I had gathered together all of my pretties that spoke to me of love, "cottage", Valentines and "shabby" and got started. I must admit, it was kind of a slow process, but well worth it.

Here are a few of the digital "papers", and I love them all! But don't stop here.. I did make some things too!


This fabric is at least 35  years old! I've had it in my stash forever.


I tore this paper into a strip for the front of a card - a really neat effect.
I ABSOLUTELY LOVE this one (below)! I've been hoarding this little fat quarter for years!


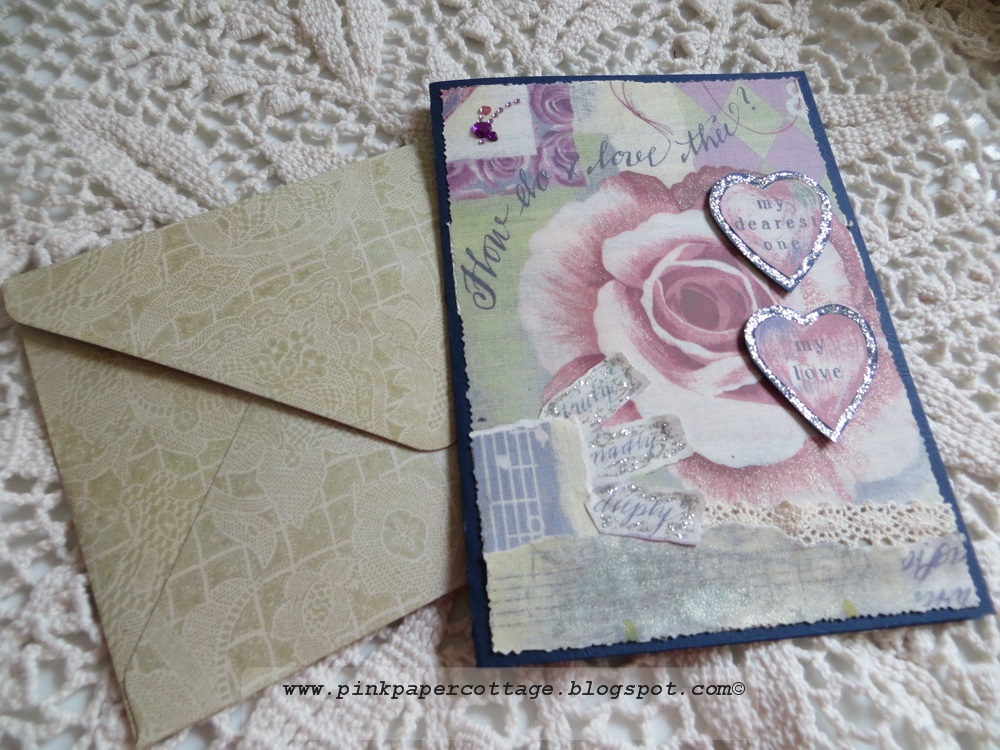
I cut out the little hearts and tags for the front of the card.


Another hoarded one (below)... I could not bear to cut it up and use it for something, but I think I've decided to make a pillowcase out of it for my "cottage style" bedroom. But so glad I made some "paper" first!  If you're not a fabric collector and hoarder, you probably wonder what in the world I'm talking about, right? Treating a piece of fabric like a cherished friend? yup.. that's what we do!

Alot of these, I even "faded out" so that I have some papers that are much softer looking.
What I love about my fabric "paper" is that it actually looks like a REAL piece of fabric glued to the front of the card! Here's what I made.  I put the piece of fabric that I scanned, in front of the card just for fun.


Look close... can you see the actual fibers in the fabric? although this is just paper that I printed out! The scanner did a great job.

I tore strips for the inside, that look like pieces of fabric.


My ALL TIME favorite.... just LOVE this fabric/paper! Swoon.n.n.n.n....... it made the prettiest little cottage shabby card.

Lots of glitter added to my handmade flower.


Each card got a special handmade envelope too.


I had more fun with these and hope to make more.  These three cards are for sale in my Etsy shop, here for the lavender and blue onehere for the "Sweet You" card, and here for my shabby cottage one.

Stay tuned for more projects. I've been on a roll!!!

                 photo Blogsignature2smallersizeforblog_zps20ad3d10.png