Photo of my and signup.

Photo of my and signup.
If you want to subscribe to follow me via Mail Chimp, the signup is in my sidebar or at the bottom of my posts.

Monday, October 28, 2013

REMINDER - FREE STUFF.

I went to the store yesterday to try to find some Christmas papers so I could begin making a Christmas gift project I have in mind.

I know it's early yet, and it's only Fall.............


But low and behold......... I could not find ANYTHING! I know it's early for Christmas stuff, but it did make me realize how lucky we are to have companies such as Close to My Heart, where we can buy, year-round, our themed papers for the various holidays. 

So, just as a quick note, I wanted to remind you that from now until December 31st, this special is going on with Close to My Heart (while supplies last).


For every $100 spent from the Autumn/Winter 2013 Idea book and/or the Holiday from the Heart catalog, you can pick any of the above items for free!

Here is the HOLIDAY GIFT GUIDE LINK for the Holidays from the Heart 24 page mini catalog. It's the catalog on the far right and may take a few seconds to open up.

The Sparkle & Shine paper is so pretty! The candy cane stripes and pretty polka dots are so versatile.

I showcased some beautiful Christmas cards at my blog post HERE a week ago where you can see these Sparkle & Shine papers close up and personal.

If you want to begin shopping now for Christmas gifts, card kits, and paper crafting supplies, both Idea Books have great papers and stamp sets for your card making and scrapbook layouts. 

For the "non-crafter", both Idea Books have some great gifts, such as a jewelry making kit, My Crush books (with add-on assortments), fabrics, Designed Decor frames for displaying artwork, and Kraft album and boxes.

And don't forget this month's (October, 2013) FREE download from Close to My Heart compliments of their "Rediscover CTMH" campaign.  Darling colors of paper strips to use in your crafts!


Go HERE to Rediscover Sweet to download the JPEG to get a high resolution image. I see five strips that will compliment and match our Frosted and Spark & Shine papers! 


Here are two cards I made using these sweet little paper strips.  The first card (for Christmas) uses the tiny strips that I printed out on a 4x6 piece of photo paper, and then I cut each one out.
I used the small strips around the middle circle tag. The two side strips are the larger ones. Add some glitter snowflakes and an edge of glitter around the middle circle tag, and you're done!
For the second card (also for Christmas), I printed larger strips on photo paper, as I like the shine of photo paper. I cut them out and mounted two behind a sentiment tag.

Add some sparkle ribbon at the top and bottom, and some glitter glue around the edges of the strips.  I stamped the background before I mounted anything, using one of our retired CTMH Christmas stamps using gold pigment ink. EASY AND QUICK!

And don't forget, there is also a fabric, Sparkle & Shine Textiles that matches and coordinates with the Sparkle & Shine papers.

Have fun and enjoy the FREE stuff!
 

Sunday, October 27, 2013

HOLIDAY PLANNER TUTORIAL (KIND OF).

I saw the cutest Holiday Planner a few months ago on someone's blog, and I immediately pinned it to my Pinterest Board, with the plan that I would make one for me, before Christmas.

Well, I have procrastinated long enough! I have had so many re-pins from my Pinterest board, that I thought I'd finally make one myself, since everyone loved it so much! There is proof in the numbers right? I think it will make cute Christmas gifts for my family, and I might even make some to put in my Etsy shop.

I used some of my ancient Christmas papers that I bought several years ago. This was my "practice" planner!
I didn't plan on this being a tutorial when I took the pictures, so I didn't get pictures of the beginning stages (folding) or the process of making this.  But................ the folding part is the most important so I used another folder I had and put together a little collage (below) of the folding process.  

You use one of those inexpensive school folders with a pocket on each side on the inside, made of heavy weight paper. The blue folder that I used for my planner had those 3 brad-type clips inside so a person could put 3-holed documents in it, but I took that out, so if you can't find a folder without them, they are easy to remove.  I think you can get these at Wal-Mart or Michael's. 

The planner that I pinned to my Christmas Pinterest board, which was from The Stamp Doc, used a white folder which I really like, but so far, I haven't found any white ones where I've looked.  I like the white background because there is no colored background strip on the sides and it looks more uniform to have it all white. I covered the white parts up on this planner, but it was kind of alot of extra work.


Folding instructions:  (read from top left to right on the 1st, row, then left to right on the 2nd row, then left to right on the third row).

1.  Plain folder laid flat.
2.  Opened folder laid flat.
3.  Fold right edge to middle crease.
4.  Fold left edge to middle crease.
5.  Pick up middle crease to form a tent.
6.  Fold both outside edges down and in, making what you see in the photo 6. You now have your folder with the "binding" edge on the left.
7.  If you let it go, it looks like this - 4 pages with pockets at the bottom of each page.
8.  Opening up to show first two pages.
9.  I cut 3" off the top rather than leaving it so tall. The final size is about 4-1/2" x 9".  If you don't cut off the top 3", the finished size is about 4-1/2" x 12".  I wanted a size that would fit in my purse to carry with me.

Are you with me so far???? The folding is really easy and quick. I mean it literally takes less than a minute.

Now I will show some pictures of each section. Mostly, you just cover the front and back with a matted piece of cardstock. Just measure each section as it may vary depending on what brand of folder you use.


Here's a close-up of the front. I matted with a red polka dot and left some of the blue folder showing. I used a few buttons I had.  I cut the scalloped square with my cricut, as well as the white square. I printed the title on my computer onto the white cardstock and then cut it out with the cricut. You could use a square punch. I used Word to make my title. If you want, you could hand-print the title or use an alphabet stamp set.

Cover each side on the top of the inside pages with coordinating papers. I matted the pieces on the pockets, but not above. The pieces above go down inside the pocket about 2". You can see where I glued strips on the top part, in the middle and on the white edge to cover the white on the side and the white in the center.

The fun part is what you put inside! Each pocket holds some "lists" of several choices. I used one for calendars, one for gift ideas and one for Christmas cards.  I'll show you below where to get these lists off the internet.


Above are the last two pockets. One holds my Christmas card list and the last pocket holds two envelopes for receipts.  I used a #10 envelope (sealed) and cut off the top for one, and a smaller envelope for the other. I glued a piece of decorative paper on the top of each envelope and stamped the word "receipts" with my alphabet stamp set. You could use one envelope for your gift cards or coupons.

I used Scotch Quick Drying Tacky Glue for adhering all of my papers. That way, I know it will hold up to handling and putting in my purse. I love it because it is easy and fast, and is flexible even after it dries.


Here are the calendars for October, November and December. I adhered each list to a piece of red cardstock about 4" x 8-1/2" and used a brad in the upper left corner to hold it. That way the paper can swing open.


Here's the back of the planner. I just put one piece of cardstock on it. The ribbon is loose and runs around to the front of the planner, underneath the title tag.

Below, is the title tag on the front. I popped it up with 3D foam tape so that the ribbon runs under it and ties on the side. The ribbon is entirely loose. I made a little "tunnel" for the ribbon using the 3D foam tape squares.
 

I put the link for The Stamp Doc above, where I found this planner.  If you go to her blog, under her video tutorials, she has a video on making this planner which is really nice.

I also found a similar planner on You Tube, using manilla file folders!  This is also a good idea, as it may be easier to find white file folders, or you can probably find them online. The file folder planner uses a little more folding to form the pockets.  That video is  HERE.

For the lists inside, you can go to Organized Home under Organized Christmas, and print out all sorts of neat lists.  I love them. You could maybe put a set of lists on the back of the cardstock that you slip in and out of the planner, as I think there is plenty of thickness.


I hope this tutorial inspires you to make some of these darling little planners! Every year, I've had lists all over the place, stuck in my purse, a drawer, by my Christmas cards, etc., and I hope this sweet little planner will keep me better organized (at least to where I can FIND my lists!).

Let me know if you have any questions.  And I WILL be putting some more of these in my Etsy shop (soon).


Sunday, October 20, 2013

KRAFT ALBUM AND MOD PODGE.


Just a quick post today to remind you of the really versatile and darling CTMH My Creations KRAFT POCKET ALBUM album! What a great gift it would make.  Here's mine (not done yet!) using this season's Huntington paper pack. 

Here's my Kraft Album cover. I"ve used some of the Huntington My Stickease  assortment for the little flags at the bottom and the sentiment and buttons. I made the dahlia type flower on the top left using of all things, last year's Pear & Partridge papers! It's amazing how so many of the CTMH papers from different catalogs match!

You can find some of my dahlia-type paper flowers in my ETSY SHOP.

Close to My Heart has just put a video on YouTube on some ideas on making an album using Mod Podge also!  I love using Mod Podge!  It protects and seals the papers when there is going to be alot of handling, especially photo albums. It is such a neat idea that I thought I'd post the video for you. Here is the video (to watch the video, you must be on my actual blog, not at your email inbox):


One pointer: When adhering the paper first to the album, instead of using the Tombo adhesive, I put a thin layer of the Mod Podge right onto the back of the paper, then put Mod Podge on the album front, and smooth the paper onto it, plus the strips of papers, and then put another layer of the Mod Podge OVER all of the papers, right over the edges onto the album.  This is a good way to be assured that the paper and the edges are snugly glued and secured to the album.  When you only use strips of adhesive to put the paper down, there will be bubbles in the paper. 

Another pointer: there may look like there are bubbles in the paper even AFTER you smooth it down really good!  but.. they go away once it is dried.

That is the way I do it anyway!  The Mod Podge is really a glue and a sealer. Once it dries, it is a little shiny and looks really neat.  I use it on all of my canvas board projects.

I inked all of the edges of the papers and my album using a Tim Holz distress ink. This Kraft album is a generous size and measures 6-3/8" x 8-1/4". There are 8 pages with 18 pockets inside. It's a great size to put 4x6 photos inside, or small envelopes and pieces of paper, flyers, memorabilia, etc.


I added some of the Huntington papers on the inside pages, inked all of the edges and added some of the Huntington My Stickease flowers. I did Mod Podge these two pages, but I don't think that's such a good idea to Mod Podge all of the pages as it makes them too thick.

I used our Kraft paper to make some 4-1/4" x 6-1/4" tags to put in the pockets. These are for journaling, and I will also do some blank tags so a person could adhere photos to them.

This photo shows the nice sheen that you get using Mod Podge.
One final photo - this is the darling Kraft album pictured in our Autumn/Winter 2013 Idea Book. This one has alot of detail and tabs on the pages. It uses the Babycakes papers. This album has not been Mod Podged.  And remember, these Babycakes papers (without the little giraffe and baby stickers) are beautiful colors to use for your Fall projects.  They aren't just for babies!

I hope you give this awesome Kraft pocket album a chance to become a gift for one of your loved ones. Try a little Mod Podge too.  And for someone who likes to craft, why not give them this album made up in a "kit", with the papers all cut out and ready to stick onto the album cover and pages, some Kraft "tags", and a set of the My Stickease stickers to match the paper set??

If you have any questions on Mod Podging, please comment or email me. The Mod Podge brand also has some great tutorial videos on You Tube. I'm always glad to help!

Wednesday, October 16, 2013

HOLIDAYS FROM THE HEART ONLINE NOW!

Today is the day! The Close to My Heart Holiday Gift catalog is now viewable HERE on my website.  I hope you will go take a look. There is a beautiful Sparkle and Shine paper pack and some other really pretty Christmas things.

The Close to My Heart gals are at it again, already making cards and projects for Christmas and there is a blog hop going on right now (see link at the end of this blog post).

Below are a few pretties that I've picked up from the various blogs of the participating consultants:

Cute owl card from  Sheila's Stamping Stuff. This shows off the darling polka dot papers in the new Sparkle & Shine paper packet.  These papers DO sparkle and shine!

From Barb's Bits and Pieces using the new Sparkle and Shine papers and one of the compliments rosettes.

Darling "easy" card from  Barb's Bits and Pieces  using the new Sparkle & Shine papers and Santa Claus stamp set.
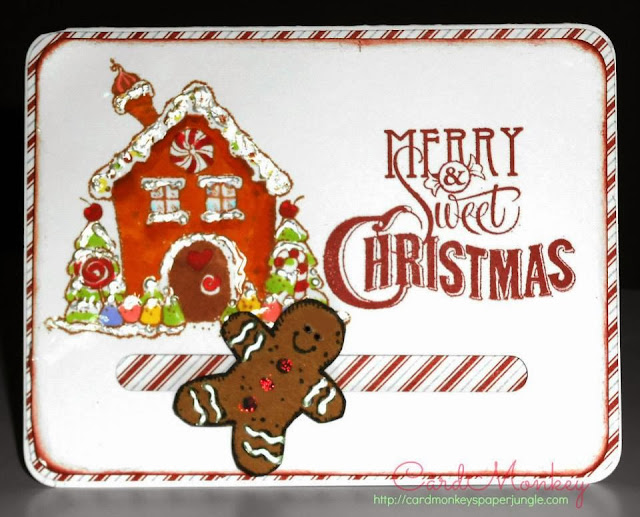
From  Card Monkey's Paper Jungle. I LOVE how the striped paper looks like candy canes!


My all time favorite card!  I am in love with this striped paper! The darling little house and "Joy" cutouts are from the CANDYLAND  stamp set in the Autumn/Winter Idea Book.
If you want to use the traditional red and green colors, here is a darling card from Tresa Black at Fabulously Artsy. She used the Pear cardstock and did some stamping on it using a background stamp called Geometric Backgrounds.

The Santa is from the Santa Claus stamp set in the Holidays from the Heart catalog which she colored with watercolor pencils. I love the traditional look of the red and green.

Here are all 10 stamps in the Santa Clause stamp set:


Bonus! Choose one “star” product FREE for every $100 in retail-priced items in your order from the Holidays from the Heart gift catalog and/or the Autumn/Winter 2013 catalog. When you check out, you will be offered the free item of your choice that is "stared" in the Holiday gift catalog.  
If you want to check out all of the CTMH consultants participating in this Holiday blog hop, please go to Pamela O'Connor's BLOG. Her blog will direct you to the next person's blog, and you can take off from there!  

The CTMH consultants who have joined this blog, are showing off each of their own creations using items from the Holiday Gift catalog (and there are MORE than cards too!). 


And while you're at it, don't forget the OCTOBER STAMP OF THE MONTH SET Scandinavian Wishes, to go with all of your beautiful Christmas projects! Yours for only $5.00 with your $50 order.

I could keep going and going... Just one more thing!  I want to remind you of the gorgeous FROSTED paper pack (available in the Fall/Winter 2013 catalog) that will be so beautiful for cards and scrapbook layouts for the holidays.  

This photo does NOT do the papers justice! They are beautiful soft gray/blues, silvers and grays with nice antique cream colors. Look in your Fall/Winter 2013 Idea Book on pages 48-52 for some creative ideas for using these papers. I love them! You can also view the Fall/Winter Idea Book HERE on my website.

And don't forget the CLASSY DOILY stamp to use with those unique Christmas cards and projects you are going to make!


If you like to color (like I do!), can you imagine what you can do with this stamp? As you can see, there is a red border around this stamp, which means that the CTMH Artiste Cricut cartridge makes a perfect cut on your Cricut machine for this doily stamp!

Here are a few things made using the Frosted papers, that have been created by some very talented CTMH consultants:


The Holidays from the Heart Gift catalog is available for ordering until December 31st, but some of the items are "while supplies last", so if there is something you really want, I would urge you to get it now!

I hope I have given you some inspiration from this blog post.  I sure have given myself some and I'm anxious to start working on my Christmas cards and gifts.

HAVE FUN AND ENJOY BEING CREATIVE!


Monday, October 14, 2013

MY ETSY SHOP IS OPEN!

With great excitement, I'm happy to announce that my Etsy shop is now open for business! 


There is a link on my side bar to my shop.  You can also click HERE TO GO TO "MY PINK PAPER COTTAGE" on Etsy. 

I have so much fun making so many things, that I decided I needed a place to share them with you. 

Etsy is a WONDERFUL market place where you can buy handmade and custom made items. There are literally millions of items for sale. I can spend hours just looking.  Everyone is so talented.

My shop is set up so you can purchase via debit card, credit card or Paypal.

HOPE YOU ENJOY IT!


Sunday, October 13, 2013

NATURE............INSPIRED..........

I was out in the woods the other day and took a ton of pictures. It is so inspiring to be out in the woods and by the river..... so I felt compelled to share some of it with you.


I love walking in the woods. I feel so insignificant compared to the majestic trees. 

 I have a "thing" for trees. I love them in all sizes, shapes and forms.


And I have a huge "thing" for water!  I NEED to be around or near water at all times and places in my life.  It energizes and refreshes me.


And if I feel "stuck" or a little down, all I need to do is go outside, walk in the woods, or stroll by the river and feel the wind in my hair, and I'm recharged and ready to get back to my life.

How does Nature inspire you?
.